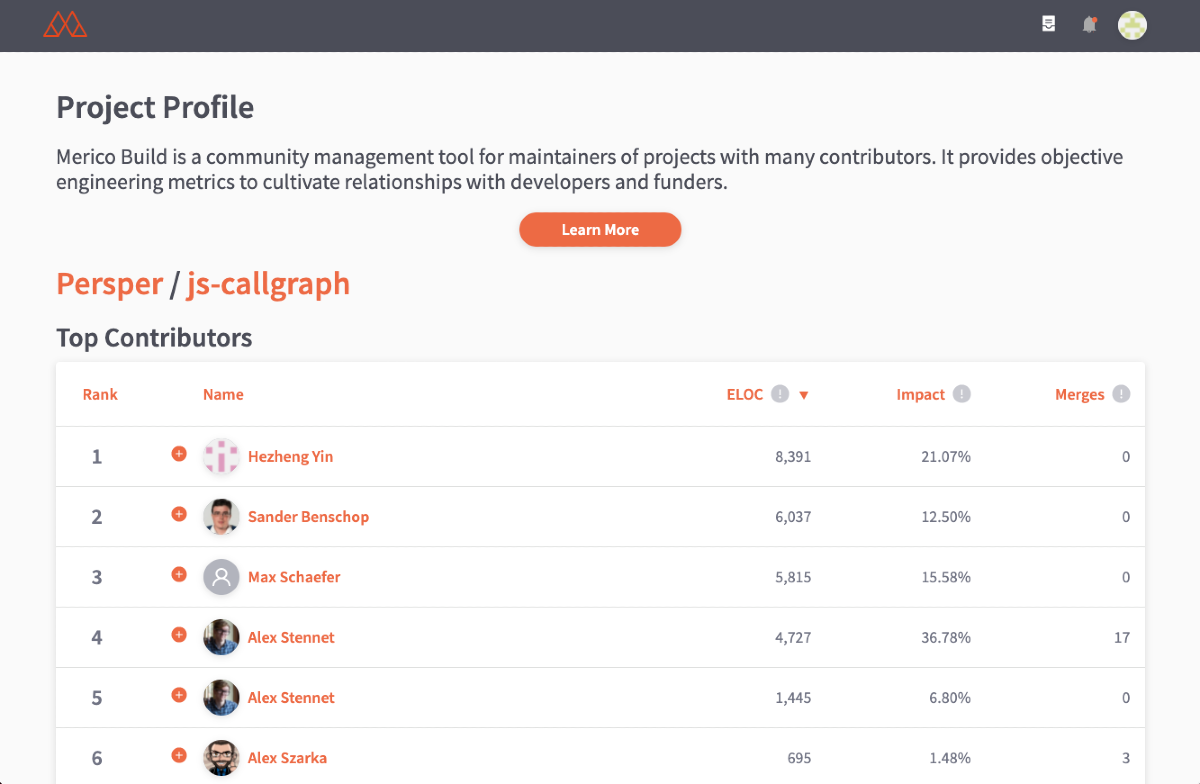
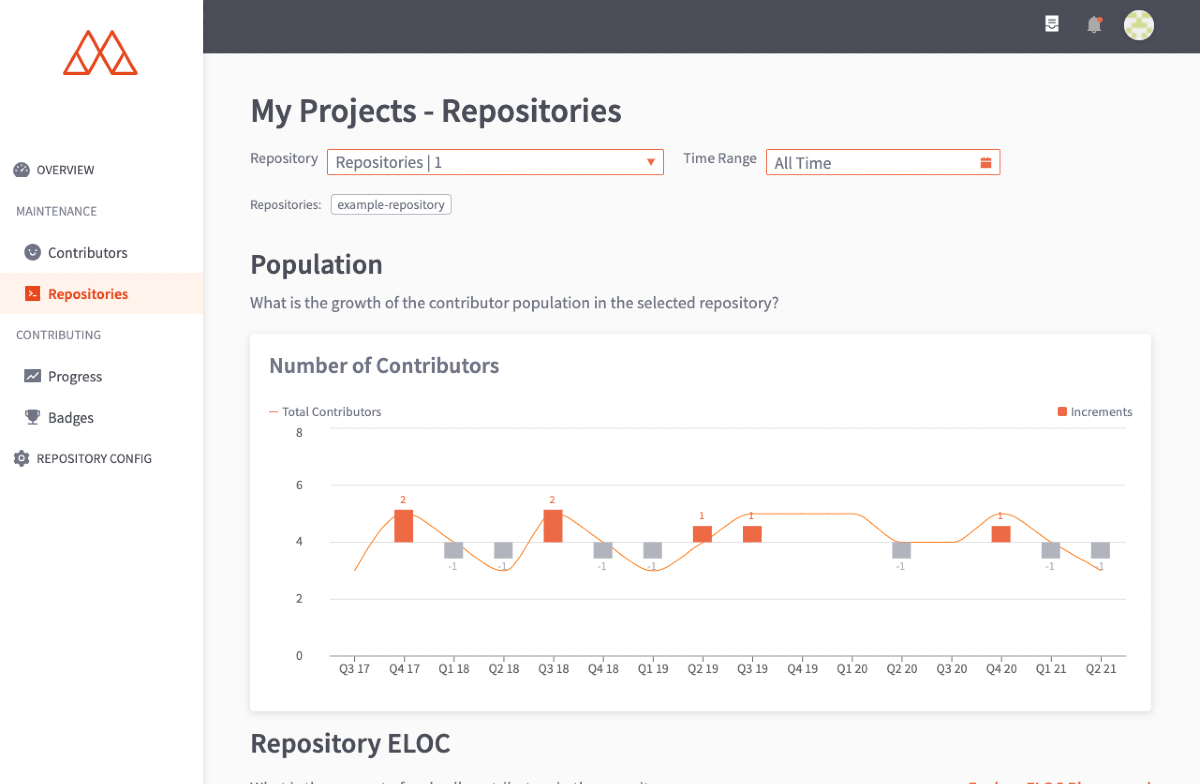
Merico Build是一个致力于用代码分析与数据挖掘赋能开源开发者,维护者,以及社区的web app。它使用新颖的静态分析来更准确地衡量代码贡献的价值和影响。
- 开源维护者可以用Merico Build的数据指标来跟踪社区的发展, 发掘更多成长中的贡献者。
- 开源开发者可以用Merico Build自动建立一个可分享且实时更新的开源个人主页,跟踪并展示他们的开源贡献。
为什么选择Merico Build?
- 静态分析驱动的代码贡献分析, 提供更加智能的指标。比如衡量代码量时,我们开发了ELOC来替换信噪比较低的代码行数(LOC)。
- 多维度综合考虑贡献,包含代码量,依赖关系,重复代码,测试覆盖度,文档覆盖度,以及未来更多指标。
- 您的开源贡献会自动转化成可以分享的徽章。
Merico始于一个加州大学伯克利分校计算机系的研究项目。 我们诚挚地邀请您加入我们,一起提高开源的透明度、健康度和可持续性。
如果您想试用Merico Build, 请访问 https://merico.build/. 如果您想贡献代码, scroll down for instructions to set up for development.
如果您想提议新的功能或有任何建议,请创建Github Issue或者加入我们的Discord!
Postgres 12.5 https://www.postgresql.org/download/
NodeJS 14.x https://nodejs.org/
To get the entire Merico Build application running on your computer, you'll need to clone and configure two different repositories: build-backend and build-frontend.
Clone the repo
git clone https://github.com/merico-dev/build-frontend.git
npm i
Clone the repo
git clone https://github.com/merico-dev/build-backend.git
npm i
git submodule init
git submodule update
cd common-backend
npm i
Rename config/local.example.js to config/local.js
Requirement: Postgres 12.5
- Create the DB
psql postgres -c "CREATE DATABASE your_db_name"
psql postgres -c "CREATE SCHEMA your_db_name"
psql postgres -c "CREATE USER merico PASSWORD 'merico'"
psql postgres -c "ALTER USER merico WITH SUPERUSER"
psql postgres -c "GRANT ALL ON ALL TABLES IN SCHEMA your_db_name to merico"
psql postgres -c "GRANT ALL ON ALL TABLES IN SCHEMA public to merico"
psql postgres -c "GRANT ALL ON SCHEMA your_db_name to merico"
-
Rename or copy
/config/database.example.jsonto/config/database.json -
Update the
developmentconfig object indatabase.json:
{
  "development": {
    "user": "merico",
    "host": "localhost",
    "database": "your_db_name",
    "password": "merico",
    "port": 5432,
    "dialect": "postgres"
  },
  ...
}
- Create the tables
psql -f db/schema-only.sql -d your_db_name -U merico
psql -f db/badge-types.sql -d your_db_name -U merico
psql -f db/refresh-views.sql -d your_db_name -U merico
build-backend requires a good deal of configuration. Most of it is required to make it work. For this section you'll be editing config/local.js.
Please note, the Analytics Engine, RabbitMQ, and Minio are all shared resources for our open source developers. As such, you may receive other contributors' RabbitMQ messages. We are working towards making the Analytics Engine open source, but in the meantime we are offering this shared service.
Merico Build uses GitHub for Oauth and for access to the the user's public repo data.
- Create a GitHub OAuth app with the following settings:
| Property | Value |
|---|---|
| Application name | your-github-username-merico |
| Homepage URL | http://localhost:1337/ |
| Authorization callback URL | http://localhost:1337/auth/github/callback |
-
Once your app is created, on the Settings page for your GitHub app,
Generate a new client secret. -
Copy and paste your GitHub OAuth App
Client IDandClient Secretto thegithubAuthconfig object inconfig/local.js.
- As a logged-in Gitlab user, go to Preferences > Applications.
- Create a new application.
- Name it whatever you like.
- Check the
read_apiandread_userpermissions. - Set the
Redirect URItohttp://localhost:1337/auth/gitlab/callback - Save the
Application IdandSecretand paste them into thegitlabAuthconfig object inconfig/local.js
Merico Build uses GRPC to execute functions on the Analytics Engine (AE). Merico will soon be making AE open source. Keep your eye out for it!
Update CA_GRPC_SERVER config value in config/local.js to the following:
'52.41.108.240:30006'
Merico Build uses Minio to store the protobuf files created by the Analytics Engine. The common-backend submodule reads these protobuf files and enters the data in the Build DB.
Update the minio config object in config/local.js to the following:
minio: {
    endPoint: '52.41.108.240',
    port: 30003,
    useSSL: false,
    accessKey: 'GmXnuzA3a27uO8RU',
    secretKey: 'ahx57GhFwZhEBlNENkz0TgVn',
    bucketAE: 'merico-analysis'
},
Build uses RabbitMQ to receive messages from the Analytics Engine about report progress and completion.
Update the RABBIT_MQ_URL config value in config/local.js to the following:
'amqp://rabbitmq:[email protected]:30001/rabbitmq'
You'll need an AWS account for this. If you don't already have one, sign up for a free AWS account.
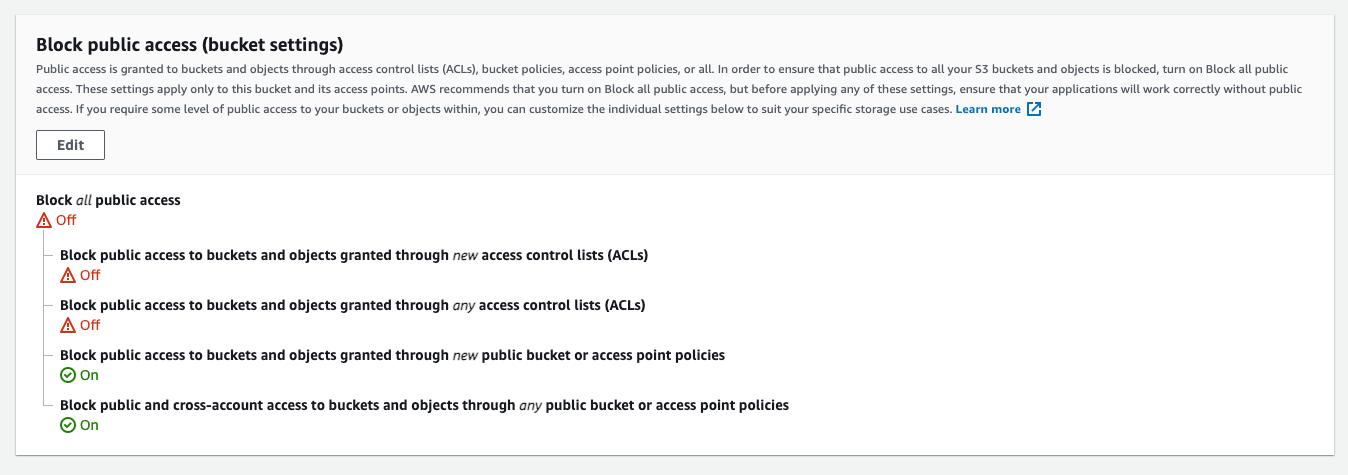
- Create a bucket. Use the following access settings:
- Create a folder called
badgeswithin the new bucket. - Use an existing IAM user, or create a new one, and give them at least the S3 permission to
putObject(for testing purposes you can just give them full S3 access if you like). Copy theirAccess KeyandSecret Access Key. - Update the
AWS_S3settings inconfig/local.jswith the newly createdbucket name,Access Key,Secret Access Key, andRegion.
*Merico Build can function without SES. It will fail to send emails, but the app can handle these errors. If you do want to get email sending functionality working, follow these steps:
You'll need an AWS account for this. If you don't already have one, sign up for a free AWS account.
- Go to the AWS Simple Email Service console.
- Verify your email domain.
- Once your domain is verified, click on
SMTP Settings. - Click on
Create my SMTP Credentials - Copy the
Access KeyandSecret Access Key - Paste them in the SES section of
config/local.js
Update the ENCRYPTION_KEY config value in config/local.js to a random string of your choosing. We use this for various encryption functions.
npm run dev
npm run dev
After you've started the frontend app and the code has compiled, you should be able to visit http://localhost:3000/ and see the Merico Build homepage.
Sign up with your GitHub account, authorize the app, and submit a repository for analysis.
Note: it's best to stick with smaller repositories for now. We do limit analysis to the latest 2,500 commits, but even still, a really large repo (e.g. Django) can take up to a day to process. Try to limit your analyses to repos with under 5,000 commits.
| Project Profile | My Repositories |
|---|---|
 |
 |
We welcome and appreciate contributions. Feel free to find your own way and put up a pull request, or join us on our discord and we can help.
Build is Apache 2.0 licensed

