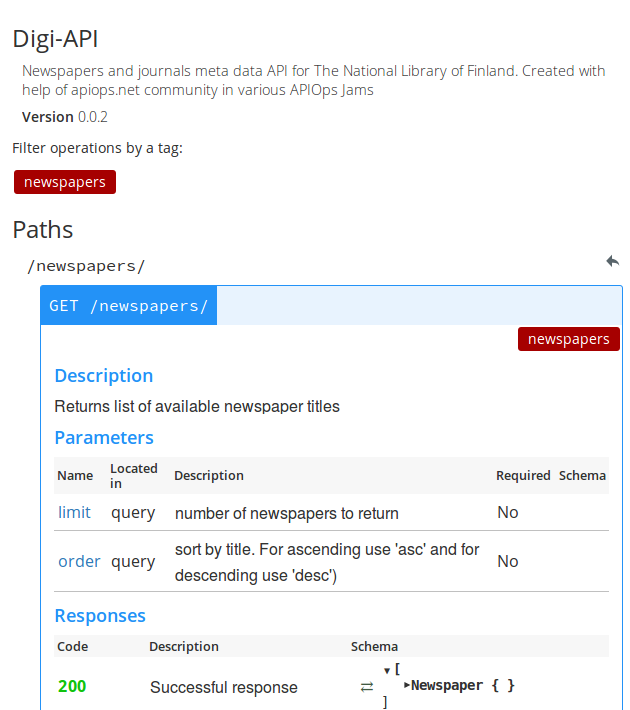
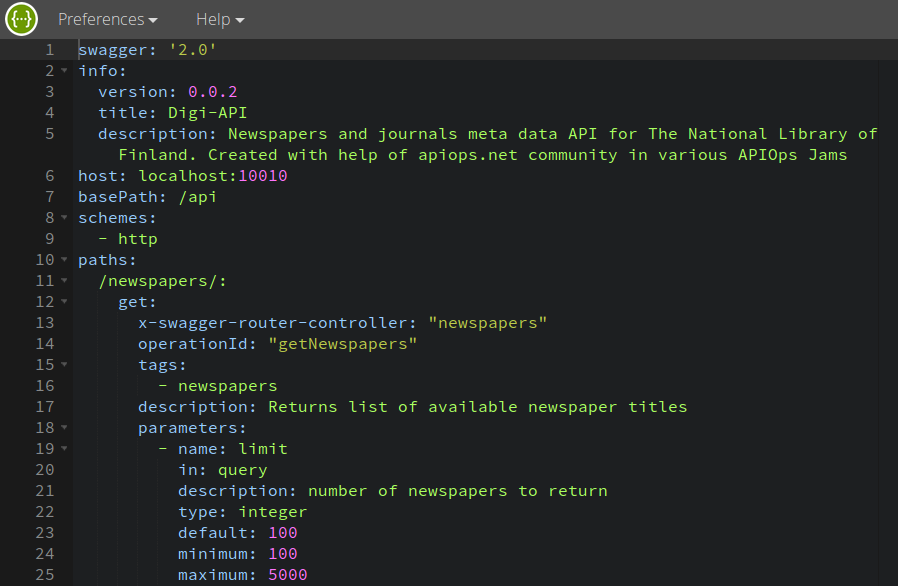
Mock mode is useful when you are designing your API model in the Swagger editor, but you're not ready to implement the API's handler/controllers. For example, you might use mock mode when you're trying to decide which API routes you need and what kind of data each API operation should return. Basically, mock mode let's you perfect your API design without writing any Node.js code. When you're happy with the overall API design, then you can implement your controller methods.
Our latest editable version of DigiAPI spec is in this repository api/swagger/swagger.yaml
This constantly updated mockup server is for developers of the spec and for others to test API locally. Server will be used until we (developers/API -consumers/customer) are happy with the design. After that backend connections are created. You can run the API locally and develop API Swagger 2.0 spec with ready-made tools. You will need:
- npm
- node
- Swagger module
- git
Installation instructions below.
Instructions:
- How to install node and npm?
- How to install swagger module?
- How to run local copy of API?
- How to edit API spec locally?
- How to read API docs locally?
- How to contribute?
We utilize Swagger node module in development. It bundles node server and Swagger editor in one package. The swagger module is designed for Node.js and is available through npm.
Here's how you install with sudo.
-
Open a terminal.
-
Run the install:
sudo npm install -g swagger
Note: sudo may or may not be required with the -g option depending on your configuration. If you do not use -g, you may need to add the swagger/bin directory to your PATH manually. On Unix-based machines
the bin directory will often be found here: /usr/local/lib/node_modules/swagger/bin.
-
Open a terminal.
-
Run the install:
npm install -g swagger
We use express API framework in our server.
-
Open terminal
-
Get local copy of your DigiAPI
git clone [email protected]:APIOps/Digiapi.git -
Go to project folder
Digiapicd Digiapi -
Install dependencies
npm install -
Run the project server.
swagger project start -mOption '-m' stands for mockup mode. -
Now, call the API!
Easiest test is to use curl via command line:
`curl http://localhost:10010/api/newspapers`
Response will be:
[{"id":1,"title":"Sample text","logo_url":"Sample text","publisher_name":"Sample text","tag":"Sample text"}]
Or you can use browser and go to above address (http://localhost:10010/api/newspapers) to see same mockup response.
To see all endpoints documentation, open project in edit mode with following actions. Make sure you have installed node, npm and swagger module. You also need local copy of project. Instructions above.
-
Open terminal
-
Go to project folder
cd [path/in/your/computer]/Digiapi/node-mockup-api/ -
Install dependencies
npm install -
Start project in edit mode
swagger project edit
Command should open DigiAPI Swagger 2.0 spec in browser (http://127.0.0.1:39146/#/). In the browser window you'll find documentation on the right side.
Here's how. Note! Any changes in the spec will be saved in your local copy of the DigiAPI spec file in api/swagger/swagger.yaml.
Make sure you have installed node, npm and swagger module. You will also need local copy of DigiAPI repository.
-
Open terminal
-
Go to project folder
cd [path/in/your/computer]/Digiapi/node-mockup-api/ -
Install dependencies
npm install -
Start project in edit mode
swagger project edit
Command should open DigiAPI Swagger 2.0 spec in browser (http://127.0.0.1:39146/#/). In the browser window you'll find editable API spec on the left side.
Note! Any changes in the spec will be saved in your local copy of the DigiAPI spec file in api/swagger/swagger.yaml.
- Report bugs on our issue tracker
- Add/modify documentation
- Improve the design with pull requests (see below)
- Choose a task from our backlog
If you want to contribute to the project, you'll need to use branches.
- Create feature branch for contribution. Create branch in Github
- You will also need knowledge of pull requests

