HyperPlay command line interface.
$ npm install -g @hyperplay/cli
$ hyperplay help
OR
$ npx @hyperplay/cli help$ npm install -g @hyperplay/cli
$ hyperplay COMMAND
running command...
$ hyperplay (--version)
@hyperplay/cli/2.14.6 darwin-arm64 node-v22.11.0
$ hyperplay --help [COMMAND]
USAGE
$ hyperplay COMMAND
...The publish command requires a local YML file. The default YML path used is ./hyperplay.yml, but you can also specify the path to this file with the --yml-path flag or the HYPERPLAY_YML_PATH environment variable.
Note that in either case, you must pass a private key for an address added to your project or account with the cli flag --private-key <value>.
Create a hyperplay.yml in your project folder.
zip is true if you want to zip the folder or file prior to upload.
- Note that for HyperPlay submissions, you will need
zip: trueunless you are uploading a zip file.
Example YML config file:
account: test-ground
project: test44
release: 0.0.7

description: Release notes go here.

platforms:
  darwin_amd64:
    path: dist/darwin/amd64/hello-go
    zip: true
    executable: go_app
  darwin_arm64:
    path: dist/darwin/arm64/hello-go
    zip: true
    executable: go_app
  linux_amd64:
    path: dist/linux/amd64/hello-go
    zip: true
    executable: go_app
# dist/windows/amd64/hello-go.zip zipped in a separate step so we don't need to zip with the cli
  windows_amd64:
    path: dist/windows/amd64/hello-go.zip
    zip: false
    executable: go_app.exe
    installScript: install_deps.exe
Run the publish command from the hyperplay cli. Set the publisher private key via an envrionment variable if CI/CD.
HYPERPLAY_PRIVATE_KEY=0x1234 hyperplay publishhyperplay help [COMMANDS]hyperplay importhyperplay keygenhyperplay publish [ACCOUNT] [PROJECT] [RELEASE]
Display help for hyperplay.
USAGE
  $ hyperplay help [COMMANDS] [-n]

ARGUMENTS
  COMMANDS  Command to show help for.

FLAGS
  -n, --nested-commands  Include all nested commands in the output.

DESCRIPTION
  Display help for hyperplay.
Import an account
USAGE
  $ hyperplay import

DESCRIPTION
  Import an account

EXAMPLES
  $ hyperplay import
Generate a new account
USAGE
  $ hyperplay keygen

DESCRIPTION
  Generate a new account

EXAMPLES
  $ hyperplay keygen
Publish a release
USAGE
  $ hyperplay publish [ACCOUNT] [PROJECT] [RELEASE] [--meta-tx] [--network <value>] [--private-key <value>]
    [--skip_hyperplay_publish] [--channel <value>] [--yml-path <value>]

ARGUMENTS
  ACCOUNT  account name
  PROJECT  project name
  RELEASE  release name

FLAGS
  --channel=<value>              [default: main] Publish build to this release channel on HyperPlay.
  --[no-]meta-tx                 Enable meta transactions
  --network=<value>              [default: https://rpc.valist.io] Blockchain network
  --private-key=<value>          Account private key
  --[no-]skip_hyperplay_publish  Do not publish to HyperPlay. Only Valist.
  --yml-path=<value>             Path to yml file containing publish args

DESCRIPTION
  Publish a release

EXAMPLES
  $ hyperplay publish ipfs/go-ipfs/v0.12.3 README.md

  $ hyperplay publish ipfs/go-ipfs/v0.12.3 dist/
Flags can also be specified with environment variables:
HYPERPLAY_PRIVATE_KEY=0x123
HYPERPLAY_NETWORK=polygon
HYPERPLAY_ANDROID_AMD64_BUILD=./android/amd64
HYPERPLAY_SKIP_HYPERPLAY_PUBLISH=false
HYPERPLAY_TARGET_CHANNEL=betaMake sure you pass the private key of your Release Manager with the flag --private-key=<private_key>
For HyperPlay Projects, make sure the public key is added as a Release Manager on your HyperPlay project. You can modify the project members at https://developers.hyperplay.xyz/<account_name>/<project_name>/settings.
It is also possible to add the public key directly to your project through the Valist registry by calling addProjectMember.
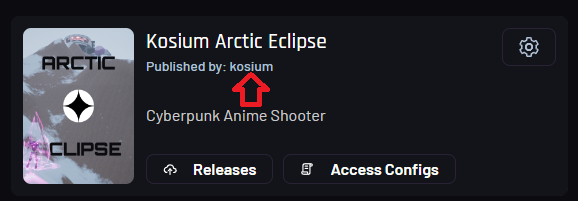
To get the account name, navigate to the HyperPlay Dev Portal and on the project card, you can find your account name in the "Published by: <account_name" text.
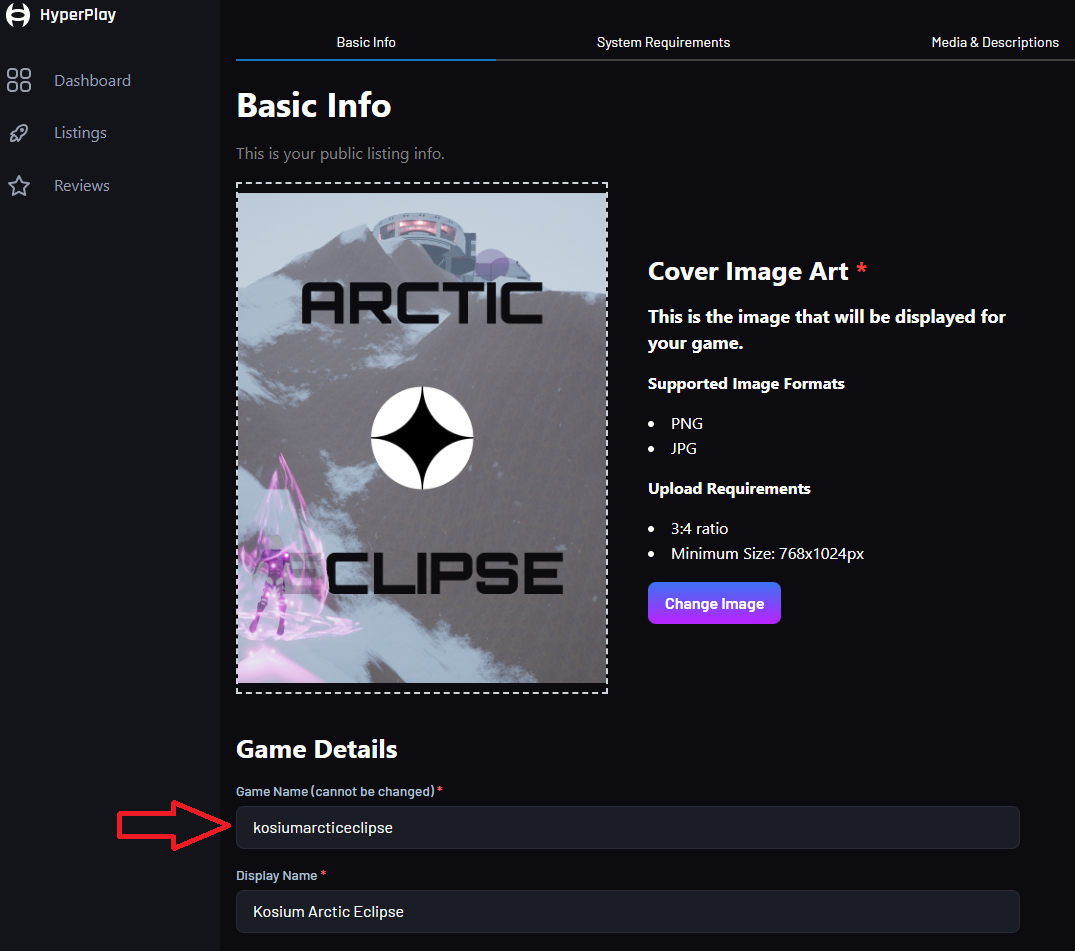
To get the project name, click the project card. The project name is in the text input field with the "Game Name" label, shown below.

