-
Notifications
You must be signed in to change notification settings - Fork 0
Quick Start Sending and Retrieving Smart Notifications
Welcome to our quick start guide on sending and retrieving Workgrid Smart Notifications. This page will give you an introduction to two of our primary APIs to send and retrieve Smart Notifications in Workgrid.
- How to provision Workgrid app credentials
- How to send a Workgrid Smart Notification
- How to provision credentials for our client APIs
- How to retrieve a Workgrid Smart Notification
- You have access to a Workgrid tenant
- You are an Organization Admin in your Workgrid tenant
- Have access to a terminal with
curlavailable. Please note that the examples shown below use the Terminal app on MacOS.
The first step is to open your web browser and navigate to https://${companyCode}.workgrid.com/console and sign in. After signing in to the Workgrid Console navigate to the "Apps" section by clicking on the item below:

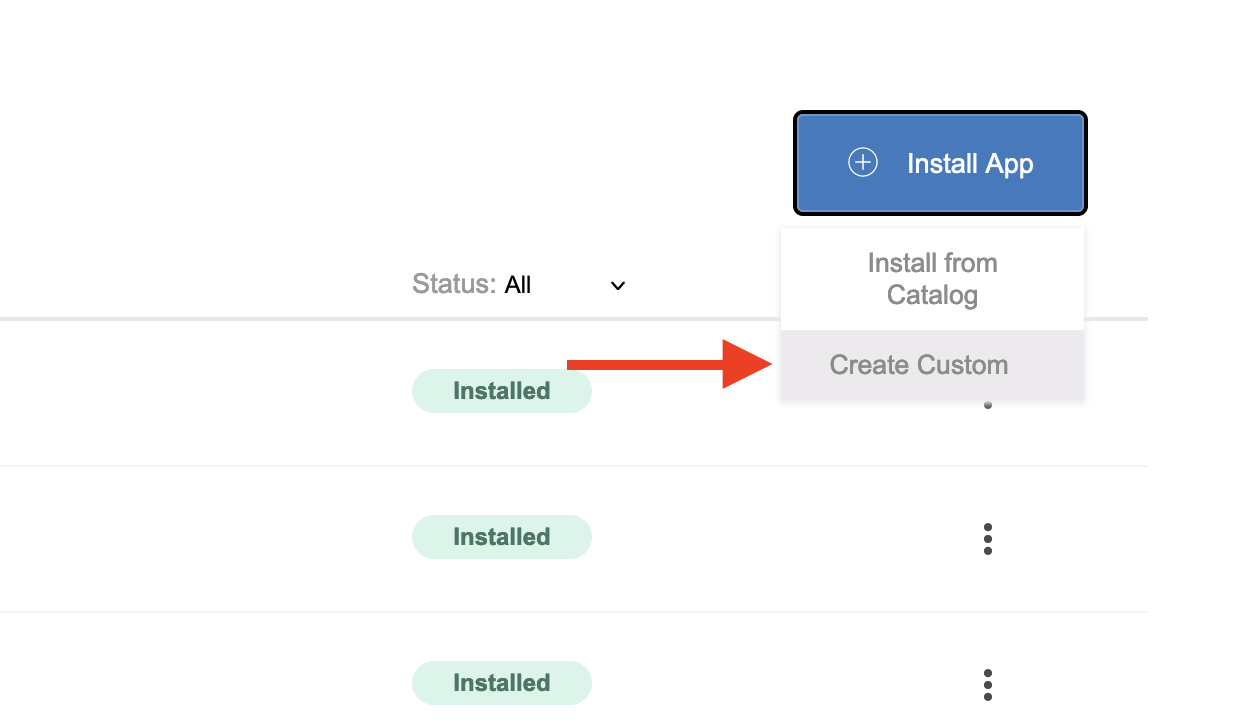
Click "Install App" and then "Create Custom"

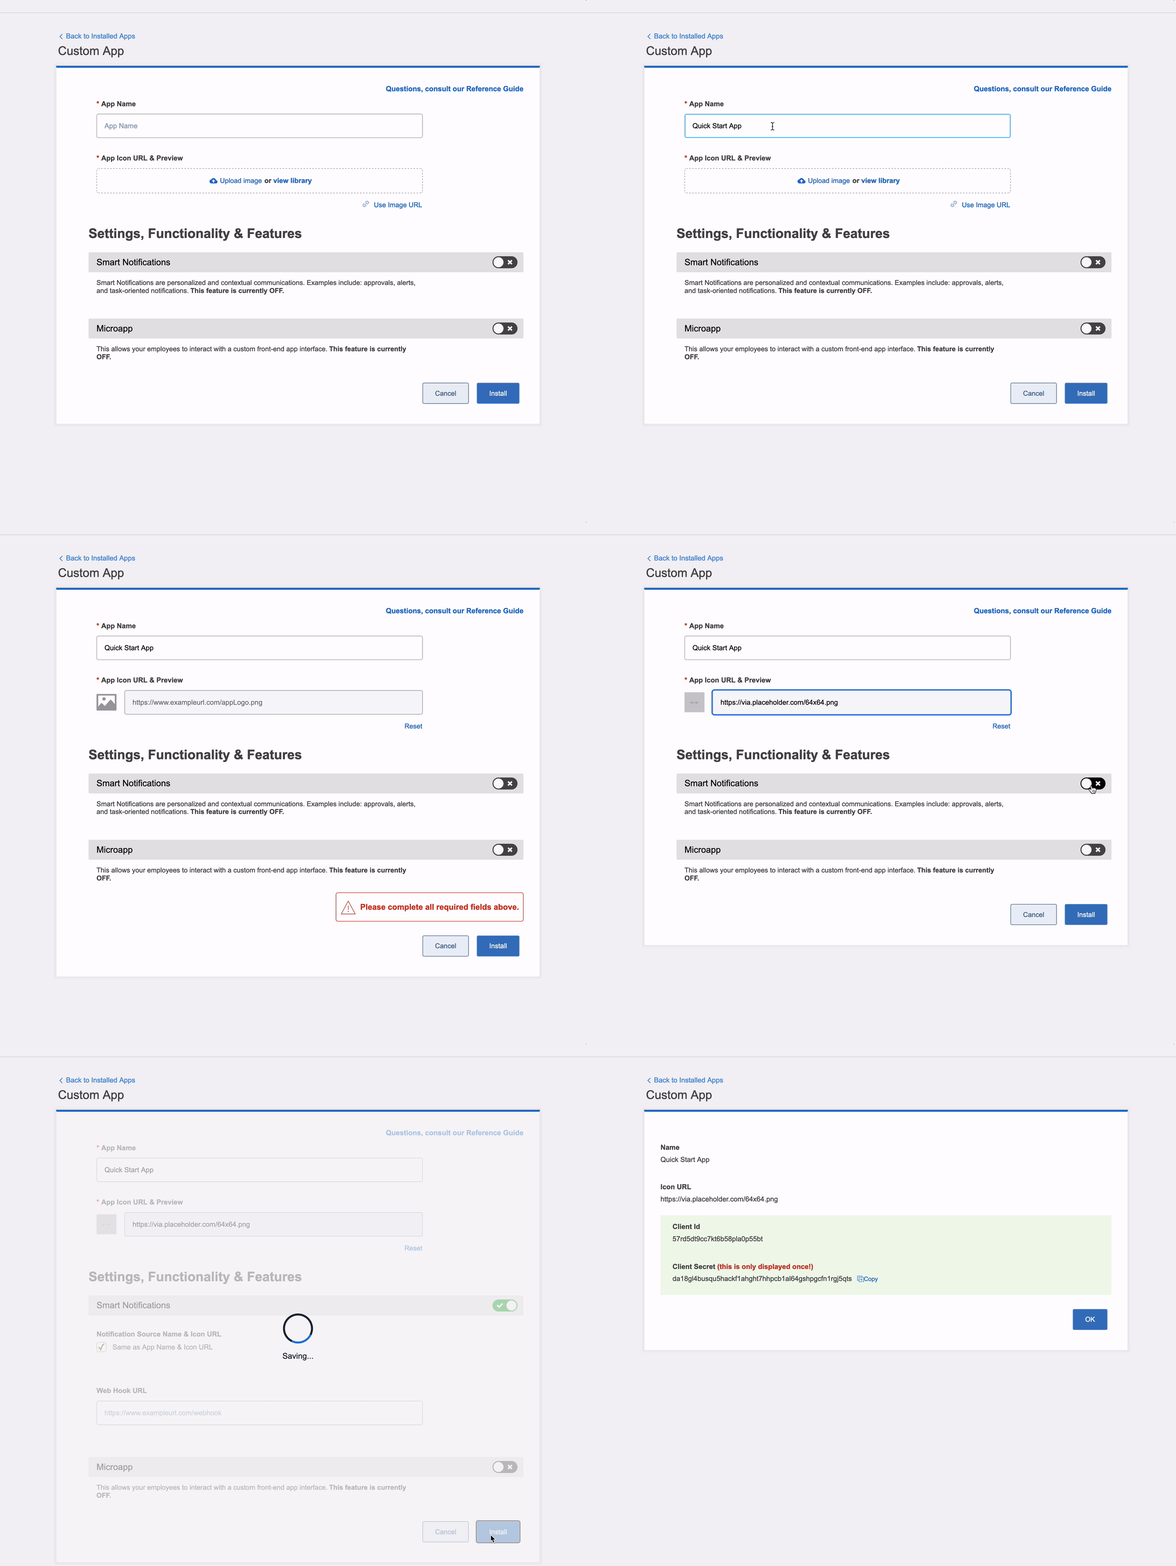
Enter an "App Name", choose an image, and click the "Smart Notifications" toggle. Once done click "Install".

Be sure to save the clientId and clientSecret. You will not be able to retrieve the password again. Keep your browser open as it will be used later in this tutorial.
Now we will work through the process of sending a Smart Notification to yourself in Workgrid. Smart Notifications are a flexible framework to deliver content to Workgrid users. In this tutorial we will be sending a Smart Notification that only contains the minimal amount of content. You can find more information about Smart Notifications and their capabilities here.
Now open a terminal on your device. We will be setting some environment variables so the commands below may need to be tailored to your platform if your shell isn't compatible with bash or zsh. To start we'll set environment variables for the app credentials, company code, and the user we want to send the notification to which is most likely yourself.
export WORKGRID_APP_CLIENT_ID=<REPLACE-WITH-CLIENT-ID>
export WORKGRID_APP_CLIENT_SECRET=<REPLACE-WITH-CLIENT-SECRET>
export WORKGRID_USERNAME=<REPLACE-WITH-YOUR-EMAIL-ADDRESS-FROM-YOUR-WORKGRID-PROFILE>
export WORKGRID_COMPANY_CODE=<REPLACE-WITH-YOUR-COMPANY-CODE>
Let's confirm they are set on your environment. On a *nix we can do that by running the command below:
$ env | grep WORKGRID_
WORKGRID_APP_CLIENT_ID=<OMITTED>
WORKGRID_APP_CLIENT_SECRET=<OMITTED>
WORKGRID_USERNAME=<OMITTED>
WORKGRID_COMPANY_CODE=<OMITTED>
Before we can send a smart notification we need to get an authentication token using an OAuth 2 client credentials grant. Run the command below to retrieve the token.
curl --request POST \
     -u $WORKGRID_APP_CLIENT_ID:$WORKGRID_APP_CLIENT_SECRET \
     --url https://auth.${WORKGRID_COMPANY_CODE}.workgrid.com/oauth2/token \
     --header 'Content-Type: application/x-www-form-urlencoded' \
     --data "client_id=${WORKGRID_APP_CLIENT_ID}" \
     --data "grant_type=client_credentials"
The response will look something like this:
{
  "access_token": "<OMITTED>",
  "expires_in": 3600,
  "token_type": "Bearer"
}
Take the value of the access_token and store it in an environment variable named WORKGRID_APP_CLIENT_ACCESS_TOKEN by running a command like the following:
export WORKGRID_APP_CLIENT_ACCESS_TOKEN="<REPLACE-WITH-ACCESS-TOKEN>"Now let's send a notification to your Workgrid user by executing the curl command below:
curl --request POST \
     --url https://${WORKGRID_COMPANY_CODE}.workgrid.com/v2/jobs \
     --header 'Content-Type: application/json' \
     --header "Authorization: Bearer ${WORKGRID_APP_CLIENT_ACCESS_TOKEN}" \
     --data "[
      {
        \"type\": \"notification.create\",
        \"data\": {
          \"location\": \"toknow\",
            \"audience\": [
                {
                    \"type\": \"email\",
                    \"value\": \"${WORKGRID_USERNAME}\"
                }
            ],
            \"version\": \"3.0\",
            \"localizations\": {
                \"en-US\": {
                    \"category\": \"Test\",
                    \"from\": {
                        \"name\": \"Quick Start App\",
                        \"iconUrl\": \"https://via.placeholder.com/64x64.png\"
                    },
                    \"summary\": {
                         \"title\": \"Hello\",
                          \"body\": \"World\"
                    }
                }
            }
        }
      }
    ]"
You should get a response like the following:
[
  {
    "jobId": "8aca3d2d-589f-4711-9bb5-ceb15d2a3abc",
    "jobType": "notification.create",
    "jobStatus": "processing",
    "correlationId": "2ab3e645-cc24-434f-99a7-2016110625f4"
  }
]
The jobStatus of processing means Workgrid is now processing your request to send a Smart Notification. If you would like to see the status of this job and confirm it has been completed run the following command in your terminal. Note the jobId returned above should form part of the URL.
curl --request GET \
     --url https://${WORKGRID_COMPANY_CODE}.workgrid.com/v2/jobs/8aca3d2d-589f-4711-9bb5-ceb15d2a3abc \
     --header 'Content-Type: application/json' \
     --header "Authorization: Bearer ${WORKGRID_APP_CLIENT_ACCESS_TOKEN}"
If the job has completed successfully jobStatus will have a value of completed.
{
  "jobId": "8aca3d2d-589f-4711-9bb5-ceb15d2a3abc",
  "jobType": "notification.create",
  "jobStatus": "completed",
  "correlationId": "2ab3e645-cc24-434f-99a7-2016110625f4"
}
Before continuing, confirm that the jobStatus is completed. Keep your terminal open as we'll use it later in this tutorial.
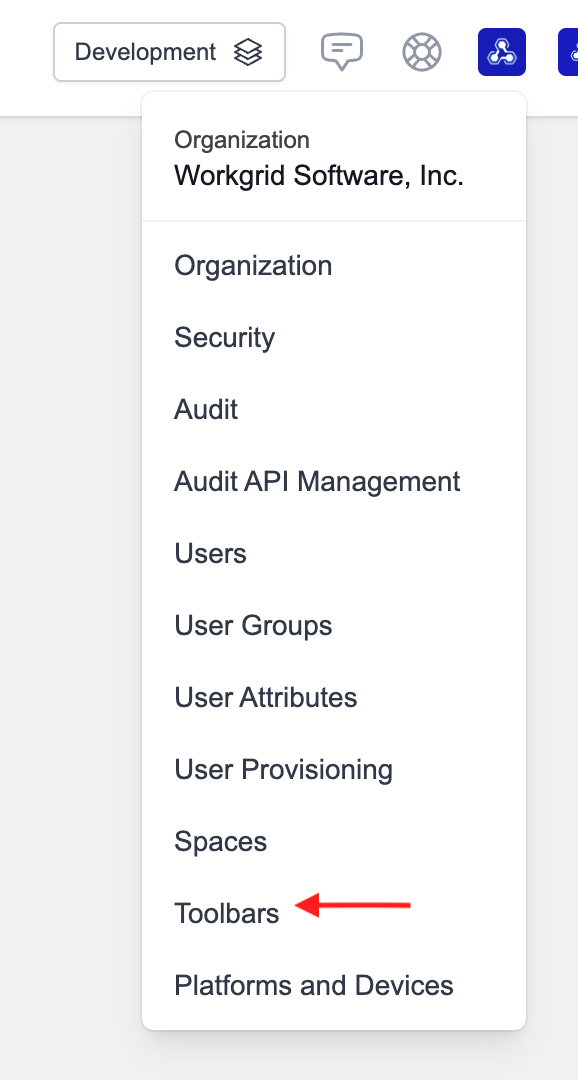
Go back to the browser tab from when you provisioned App credentials earlier and click on the "Toolbars" navigation item as shown below:

Once in the Toolbar section click "Add Toolbar":

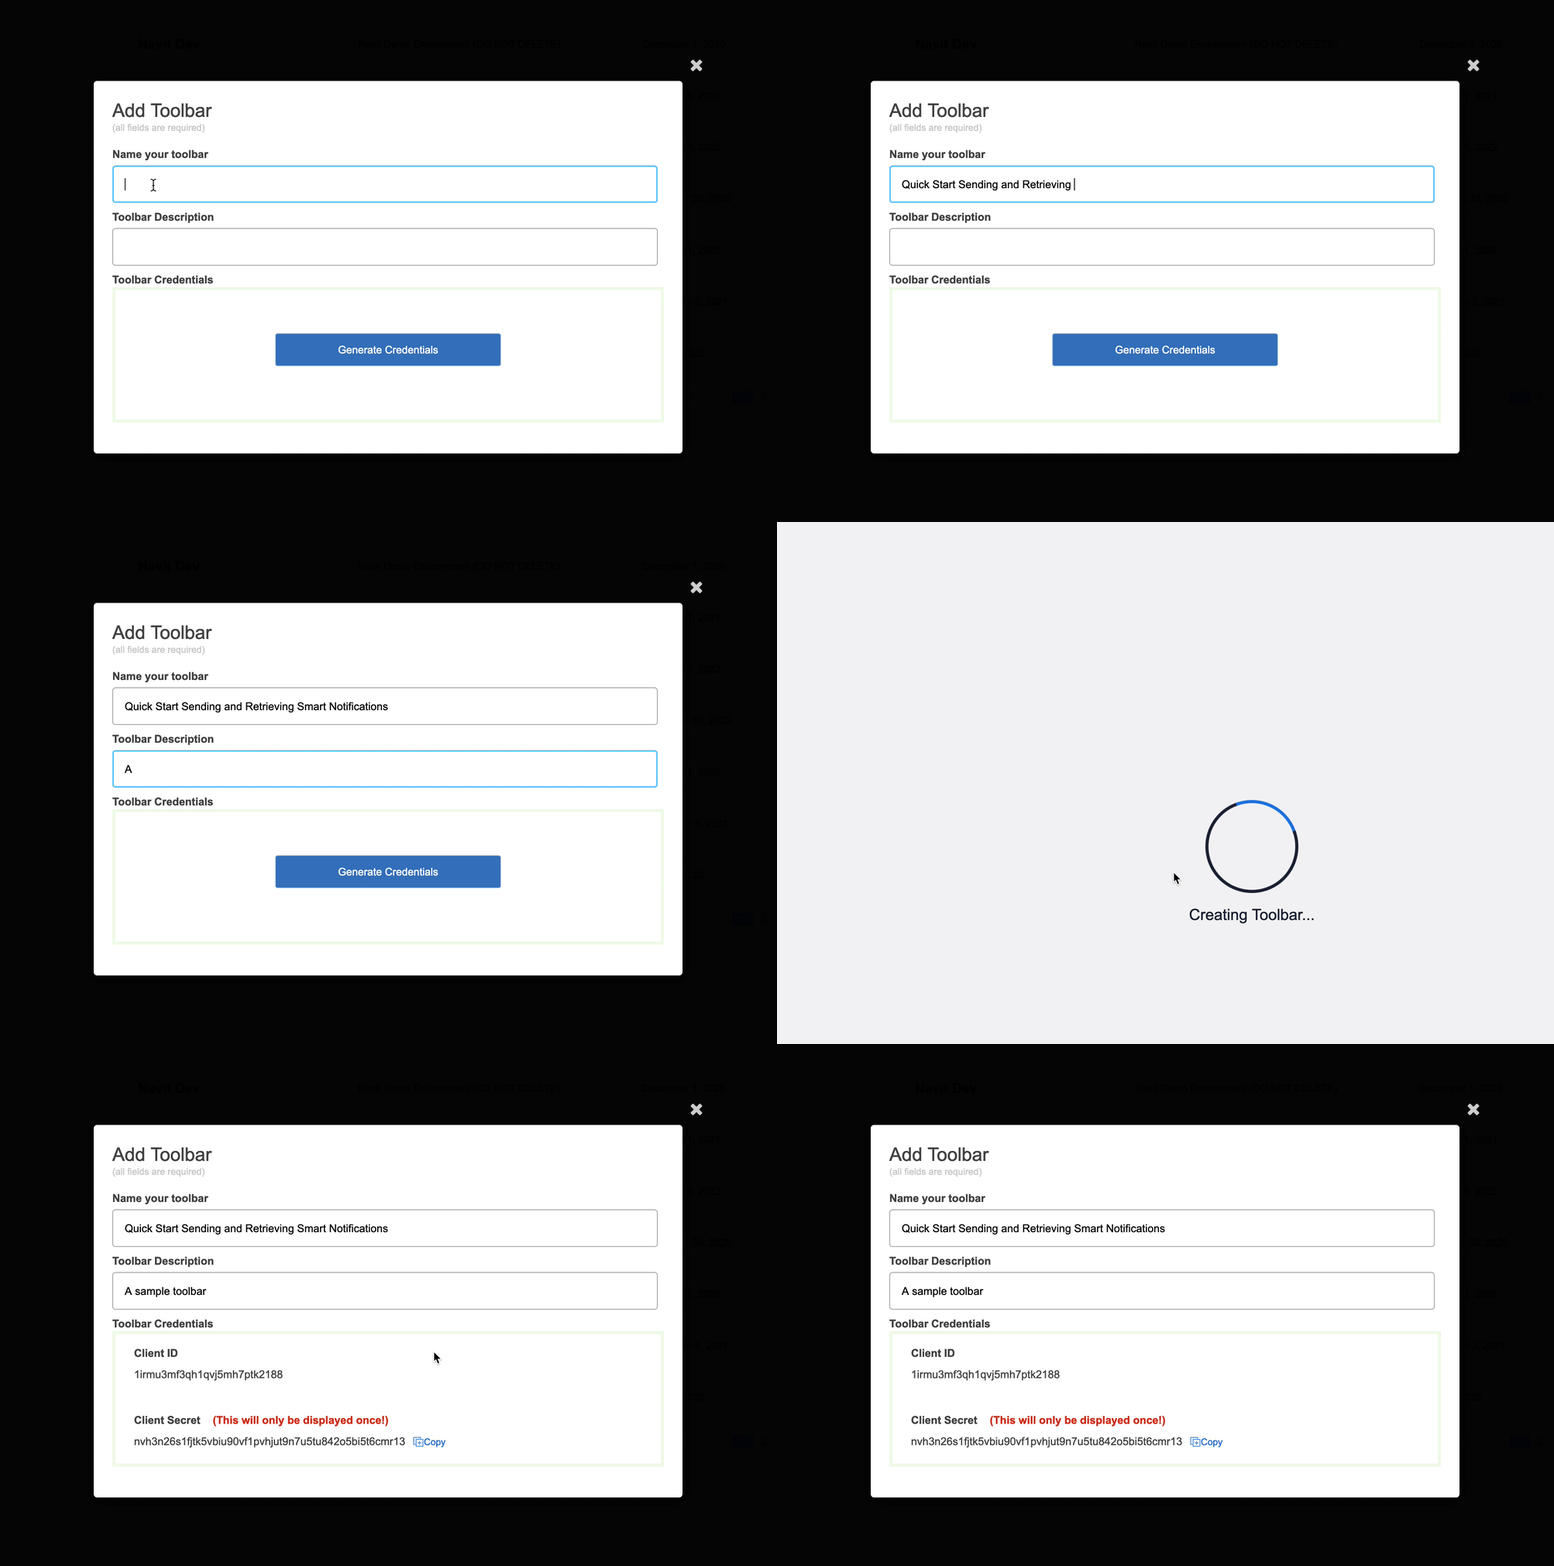
Then fill in the "Name", "Description" and click "Generate Credentials":

Be sure to save the clientId and clientSecret. You will not be able to retrieve the password again. You can now close your browser window.
Now we'll work through the process of retrieving the notification that you sent to yourself earlier in the tutorial. Before we can retrieve a Smart Notification we need to grab the id of the Space that you'll be using for this tutorial. In your browser navigate to the Spaces section by clicking on the "Spaces" navigation item.

Find the space you'd like to use in the list and click the "pencil icon" to the right of the space name. Once on the edit screen for the space you can find the space id as shown below:

Now go back to your terminal from the previous part of this tutorial. We need to add another environment variable to represent the space id as well as the client credentials we provisioned in the previous section.
export WORKGRID_SPACE_ID=<REPLACE-WITH-SPACE-ID>
export WORKGRID_USER_CLIENT_ID=<REPLACE-WITH-USER-CLIENT-ID>
export WORKGRID_USER_CLIENT_SECRET=<REPLACE-WITH-USER-CLIENT-SECRET>
Let's confirm we have set it by running the command below and ensuring that the variable we set is populated with the correct value.
$ env | grep WORKGRID_
WORKGRID_SPACE_ID=<OMITTED>
WORKGRID_USER_CLIENT_ID=<OMITTED>
WORKGRID_USER_CLIENT_SECRET=<OMITTED>
Similar to before when getting the token for the application, we will rerun the OAuth 2 token request with our new user client id and secret. This is necessary before we can retrieve a Smart Notification. Run the command below to retrieve the token.
curl --request POST \
     -u $WORKGRID_USER_CLIENT_ID:$WORKGRID_USER_CLIENT_SECRET \
     --url https://auth.${WORKGRID_COMPANY_CODE}.workgrid.com/oauth2/token \
     --header 'Content-Type: application/x-www-form-urlencoded' \
     --data "client_id=${WORKGRID_USER_CLIENT_ID}" \
     --data "grant_type=client_credentials"
The response will look something like this:
{
  "access_token": "<OMITTED>",
  "expires_in": 3600,
  "token_type": "Bearer"
}
Take the value of the access_token and store it in an environment variable named WORKGRID_USER_CLIENT_ACCESS_TOKEN by running a command like the following:
export WORKGRID_USER_CLIENT_ACCESS_TOKEN="<REPLACE-WITH-ACCESS-TOKEN>"Once we have this token we can now use it to generate a token that will allow us to impersonate a user in Workgrid so we can interact with the Workgrid APIs on their behalf. To do that execute the following request:
curl --request POST \
     --url https://${WORKGRID_COMPANY_CODE}.workgrid.com/v2/tokens \
     --header 'Content-Type: application/json' \
     --header "Authorization: Bearer ${WORKGRID_USER_CLIENT_ACCESS_TOKEN}" \
     --data "
      {
        \"username\": \"${WORKGRID_USERNAME}\",
        \"expiresIn\": 3600
      }"
The response will look something like this:
{
  "token": "<OMITTED>",
  "apiHost": "${WORKGRID_COMPANY_CODE}.workgrid.com"
}
Take the value of the token and store it in an environment variable named WORKGRID_USER_TOKEN by running a command like the following:
export WORKGRID_USER_TOKEN="<REPLACE-WITH-TOKEN>"Now we can fetch the Smart Notification that we sent earlier in the tutorial. Execute the following command:
curl --request GET \
 --url "https://${WORKGRID_COMPANY_CODE}.workgrid.com/v1/toknow?orderBy=date" \
 --header "Authorization: Bearer ${WORKGRID_USER_TOKEN}" \
 --header 'Accept: application/vnd.com.workgrid.ast+json;version=1' \
 --header "x-workgrid-space: ${WORKGRID_SPACE_ID}"
The response will look something like this:
{
  "notifications": [
    {
      "id": "87acc6ef-f909-4641-8b3c-f9a0b488566e",
      "correlationId": "2ab3e645-cc24-434f-99a7-2016110625f4",
      "priority": "informational",
      "category": "Test",
      "hiddenBefore": "2022-07-11T17:54:59.477Z",
      "hiddenAfter": "2022-10-09T17:54:59.477Z",
      "actionStatus": "none_taken",
      "displayLifecycle": "simple",
      "sortValue": "00009000300000000000000000001657562101",
      "section": "toknow",
      "isVisible": true,
      "version": 3,
      "actions": [],
      "from": {
        "name": "Quick Start App",
        "iconUrl": "https://via.placeholder.com/64x64.png"
      },
      "isDeletable": true,
      "title": {
        "type": "Title",
        "children": [
          {
            "type": "paragraph",
            "children": [
              {
                "type": "text",
                "value": "Hello"
              }
            ]
          }
        ]
      },
      "body": {
        "type": "Body",
        "children": [
          {
            "type": "paragraph",
            "children": [
              {
                "type": "text",
                "value": "World"
              }
            ]
          }
        ]
      }
    }
  ]
}
Congratulations! You have delivered and retrieved your first Smart Notification in Workgrid. Please visit our next tutorial Quick Start: Actioning and Processing Smart Notifications to learn how to create Smart Notifications that capture an action from a user.