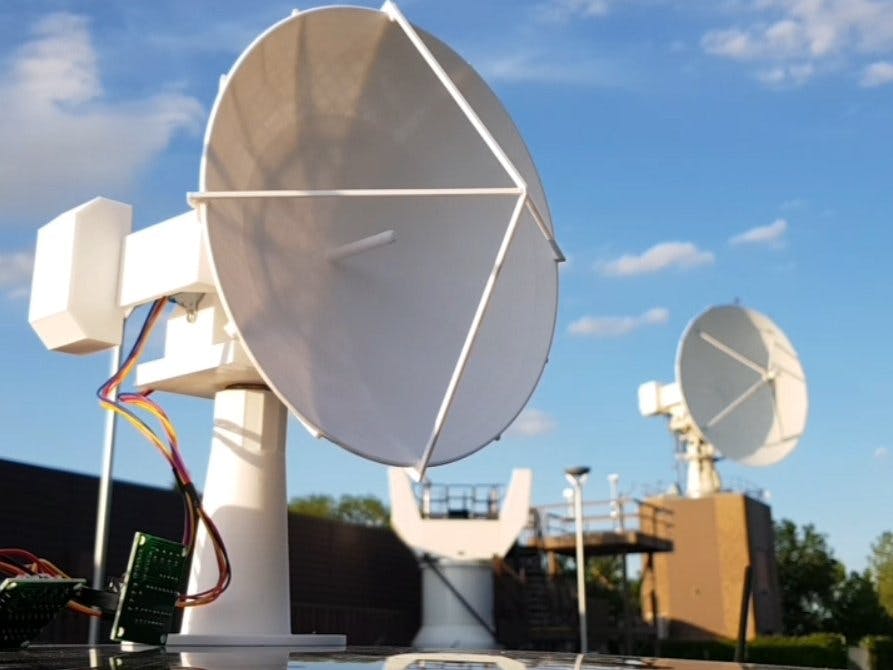
I made this project a couple years ago and since then Celestrak has moved from http to https. Unfortunately I don't think the Arduino MKR 1000 supports https requests. I'm working on an updated version of this project using an ESP-32 which is much cheaper anyways. So as it is, the code in this repo will not work anymore sorry.
This repository contains the code for my satellite tracker:

Link to the project on Hackster.io: https://www.hackster.io/alex_chang/satellite-tracker-13a9aa
Link to post on Reddit: https://www.reddit.com/r/3Dprinting/comments/hr43pz/i_made_a_3d_printed_satellite_dish_that_tracks/
- This code was written for use with the Arduino MKR 1000 WiFi board
- You will need the following libraries:
https://github.com/Hopperpop/Sgp4-Library
https://github.com/arduino-libraries/RTCZero
https://www.airspayce.com/mikem/arduino/AccelStepper/ - Place all the .INO files from this repository into the same folder on your computer, name it "tracker_main".
- If you only want to track the ISS you can use the modified code in the trackISS branch on this repository.
- Go to tracker_main.ino and change the values under the section "to be modify by user" for your location and satellites of interest
- TLEs of satellites are obtained from Celestrak, simply copy the URL for the satellite you want (without the 'celestrak.com'),
for example the international space station would be "/satcat/tle.php?CATNR=25544" - After uploading the code to your MKR 1000, you should see something like this after opening the serial monitor:
Attempting to connect to SSID: SASKTEL
Connected to wifi
unixtime: 1594912657
connected to server
Request #: 0 For: RADARSAT-2
Next pass for: RADARSAT-2 In: 1769
Start: az=4.63° 9:47:6.51
connected to server
Request #: 1 For: NEOSSAT
Next pass for: NEOSSAT In: 669
Start: az=234.11° 9:28:46.78
connected to server
Request #: 2 For: M3MSAT
Next pass for: M3MSAT  In: 3018
Start: az=22.04° 10:7:55.41
connected to server
Request #: 3 For: SCISAT
Next pass for: SCISAT In: 13642
Start: az=127.39° 13:4:59.61
Next pass for: 104.168.149.178 In: 669
Start: az=234.11° 9:28:46.78
TLE set #:0
1 32382U 07061A_  20198.38554627  .00000214 .00000-0 .10000-3 0  9993

2 32382  98.5752 204.5392.0001163  91.9428  44.4684 14.29984692657108

TLE set #:1
1 39089U 13009D_  20198.28987130  .00000028..00000-0..25284-4 0  9995

2 39089  98.4660  39.5659.0010910 196.2674 163.8162 14.34513825386692

TLE set #:2
1 41605U 16040G_  20198.12638580  .00000348 .00000-0 .18478-4 0  9997

2 41605  97.3115 253.5653.0013872  97.0655 263.2159 15.21419137225658

TLE set #:3
1 27858U 03036A_  20197.77266286  .00000016 .00000-0 .73404-5 0  9995

2 27858  73.9337 129.0770.0008645 321.7990  38.2571 14.77294210911839

Next satellite: 1

Local time: 16/7/2020 9:17:43.00
azimuth = 199.28 elevation = -24.56 distance = 6840.21
latitude = -6.76 longitude = -123.44 altitude = 787.99
AZStep pos: 0
Status: Standby
Next satellite is: NEOSSAT in: 663
- Here you can verify the predictions are correct and that the local time is correct (your results will differ depending on your time/location/satellite).
- The last few lines will continue to update over time and you should see the satellite approach.
- The steppers have no way of determining their positions so they assume they start at AZ = 0, EL = 20—you will have to set this up by hand.
- Do not try to power the steppers using the Arduino!
- To speed up testing, you can replace line 109
timeNow = rtc.getEpoch();
with
timeNow = testTime;
and replace testTime with an epoch time that is just a few mins before a satellite pass.
You can contact me at: [email protected]