-
Notifications
You must be signed in to change notification settings - Fork 150
Creating a New Page
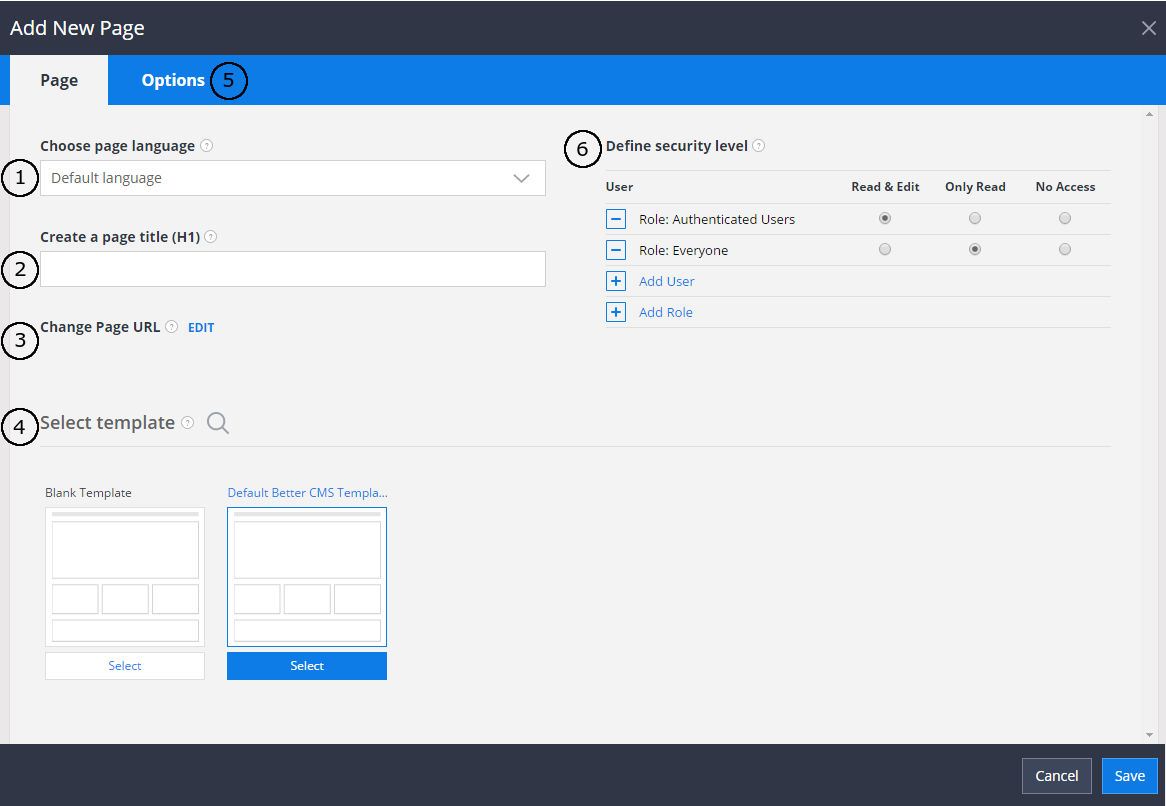
To create a new page on your website, click the “New Page” icon on the side menu. The page title (2), or H1 tag, is important for telling search engines what your page is about, so it should include your keywords. You have the option to edit the page URL (3) if you’d like it to differ from the one that is automatically generated from your page name. Next, select a template (4) for your page. This will determine where content regions are positioned and how all of the page information will be displayed.
-
If you have multiple languages in your website, select a language the page is created in.
-
Add page title (the name of the page).
-
Page URL will be created automatically depending on your entered title. If such URL already exists, system will add postfix (for example, if URL
/my-page/exists,/my-page-1/will be created). URL can be changed any time, by clickingEditlink. Also, parent prefix will be added. if new page creating from URL/parent-page/, the URL/parent-page/my-page/will be created. -
Select template from templates list. New templates can be registered in the Site Settings -> Templates dialog or created as .cshtml file at server side and uploaded by system administrator. You can read more here about templates.
-
Enter page option values. How to manage page options, can be found here.
After page is created, page properties can be edited by pressing Properties button in the side menu. Page SEO information can be edited by pressing Edit SEO button in the side menu.
Note: page path cannot contain spaces and special symbols: , #, ?
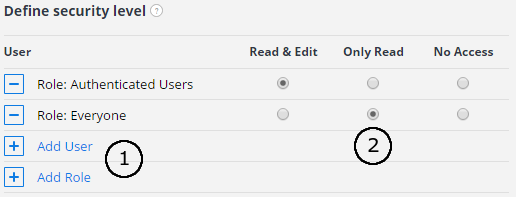
If access control is enabled, on the bottom of the form appears controls for managing access security. User can manage users and / or roles, which can access page. If access level is set to deny, users cannot view the current page. If access level set to read only, page will be opened in read only mode: all edit forms can be viewed, but not saved.
Note: If trying to save page with no one user/role, which have Read&Edit access level, exception occurs.
- By clicking one on the links, input field appears and user name or role name can be entered.
-
Read&Edit,Only ReadorNo accessaccess level can be assigned to users/roles.
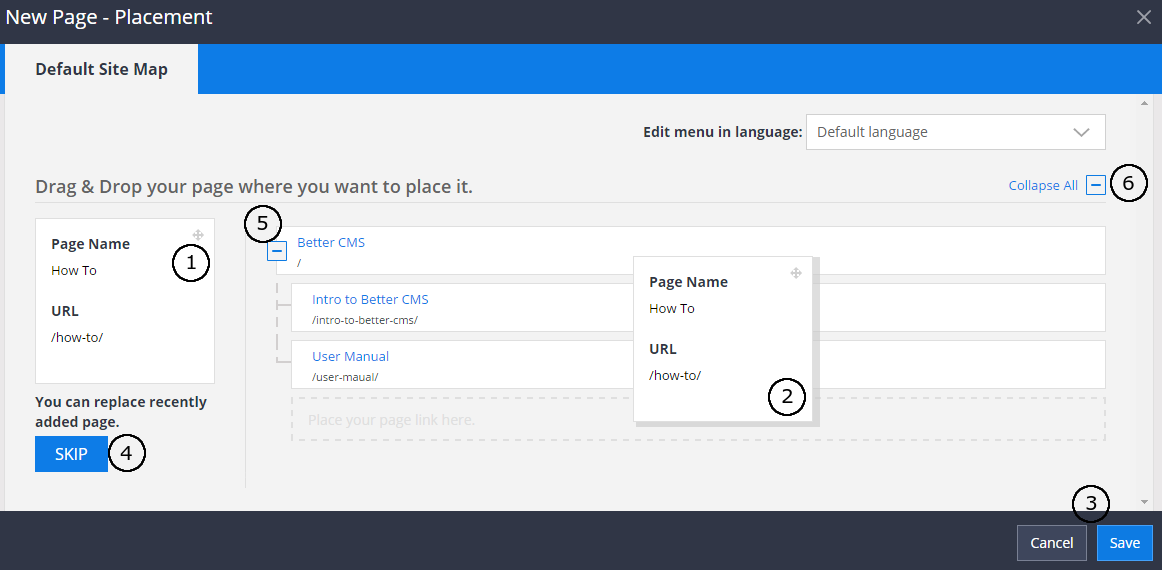
After page creation dialog you will get to the dialog for the page placement into a menu.
- Click and hold your mouse button down on the new page node
- to drag it to the menu and release the mouse button when target drop area will be shown.
- And save or cancel your action.
- Alternatively you can skip this action.
- For easier access to the sub nodes click this little button to expand or collapse the node
- or collapse or expand all the nodes at once.


