-
Notifications
You must be signed in to change notification settings - Fork 150
Widgets
In Better CMS there are two types of widgets:
- Content widgets (simple html content that can be used on multiple pages);
- Server widgets;
Content widgets can be created via Better CMS control panel. They are simple to create and function in a very similar way to regular content.
Server widgets are used for the website functionality that needs server side processing.
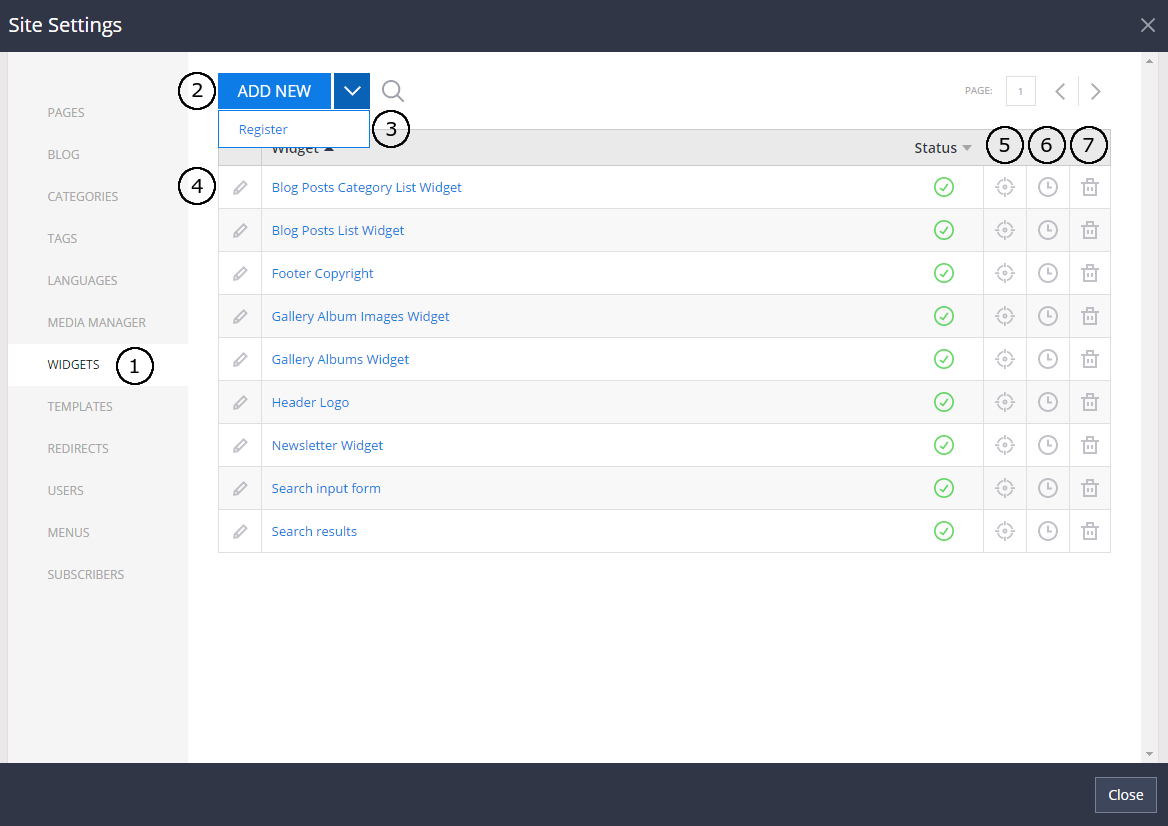
All the widgets of the website can be found at Site Settings:
- Widgets menu is located at the middle of the Site Settings menu.
- Button to add new reusable content widget.
- Button to register server widget.
- Button to edit widget.
- Button to see usages of the widget.
- Button to go to the history of the widget (it is possible to restore the changes!)
- Button to remove widget.
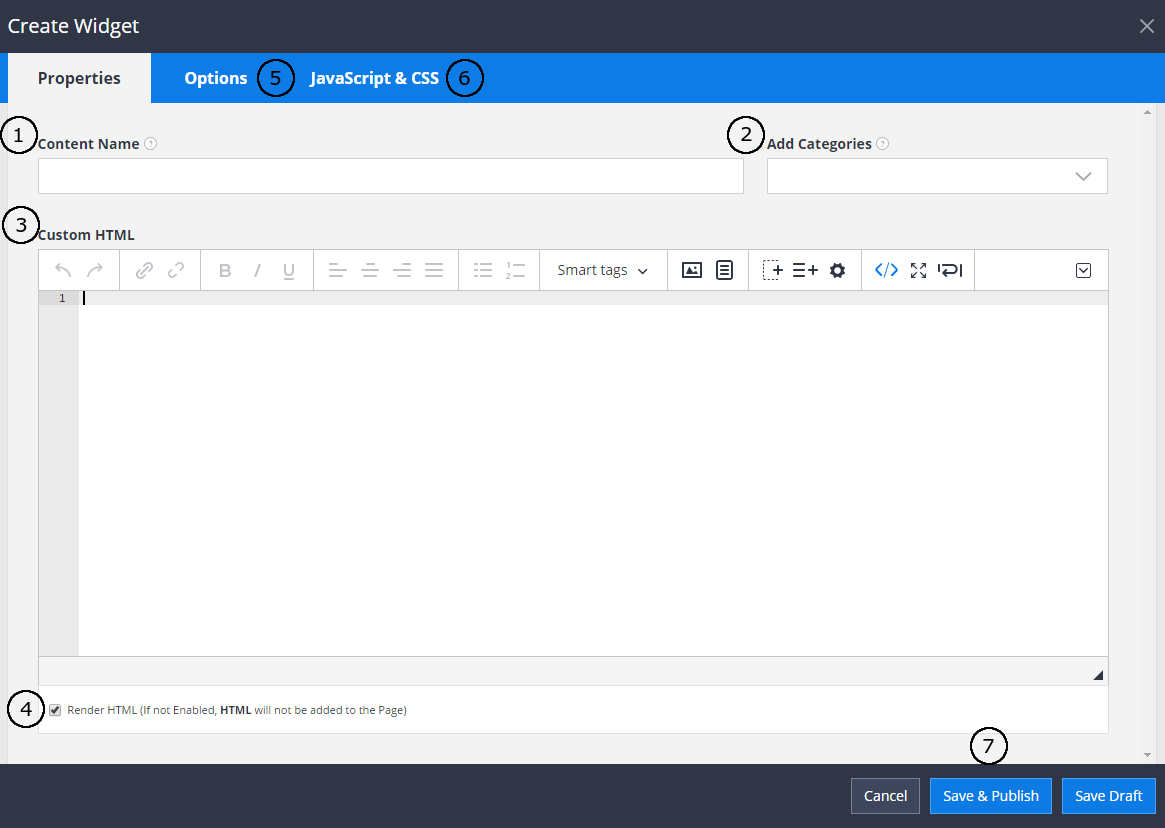
Html content widget can be treated as regular content only with feature to reuse it in multiple places on different pages. Because of that it is editable in a very similar way to the regular content editing.
- Input filed for widget title.
- Widget category (for reference only).
- Text editor to add all the Html content needed.
- If you are not planning to use any Html in your widget, you can choose not to render it.
- You can customize your widget by adding additional options.
- Or you can style it and add some dynamics by adding custom CSS and JavaScript.
- Buttons to save or cancel all the changes you made for the widget.
Server Widgets registration is an advanced option and intended to be used by the website administrators. But in case if you are provided with all the required information to register server side widget - its very easy to do it by yourself. Just follow the instructions.
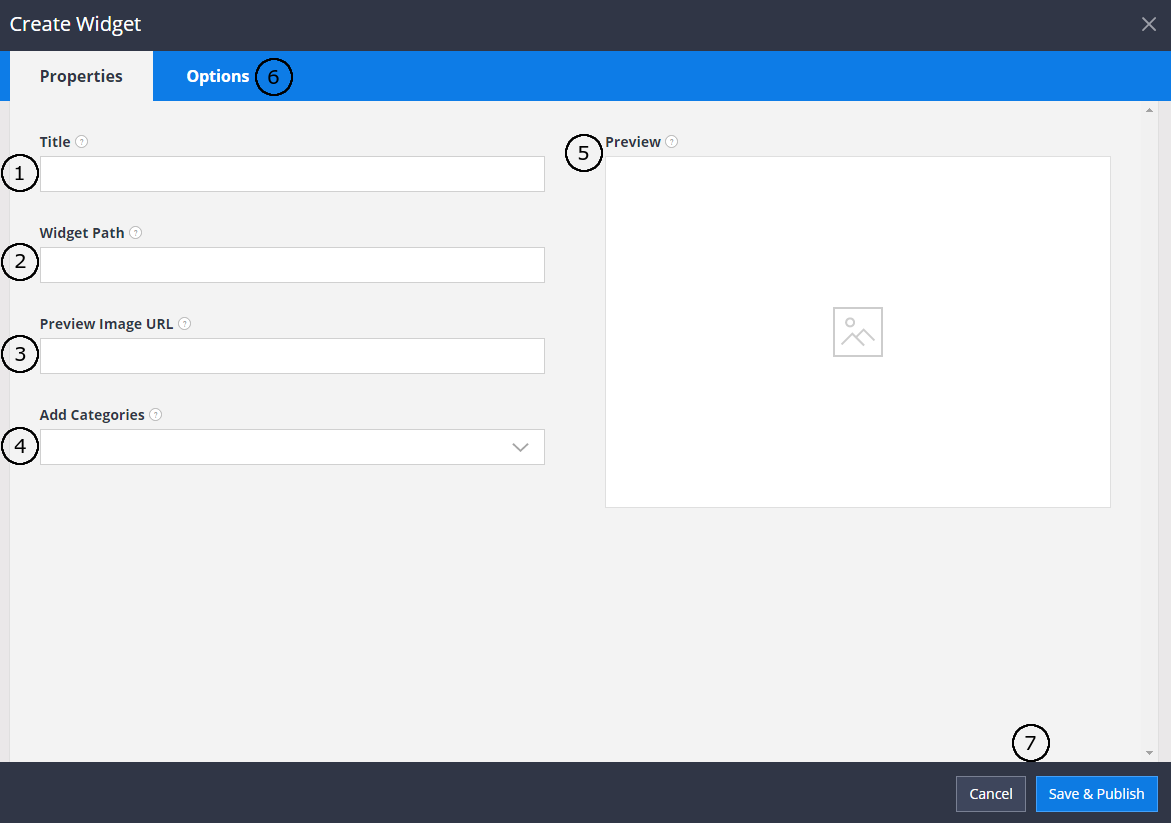
Go to the Site Settings Widgets menu, click on the dropdown arrow near Add New button and hit the Register option.
- Input page title.
- Select the category you want our widget to be in.
- Type the server path to the widget (must be provided by the widget developers).
- Set the preview image URL path to identify the widget (optional).
- The preview image will be shown here if you provided a correct URL in step 4.
- Open and input all the widget options if any were provided by the widget creator. More about options how to manage them can be found [here] (https://github.com/devbridge/BetterCMS/wiki/Options).
- Save the widget.
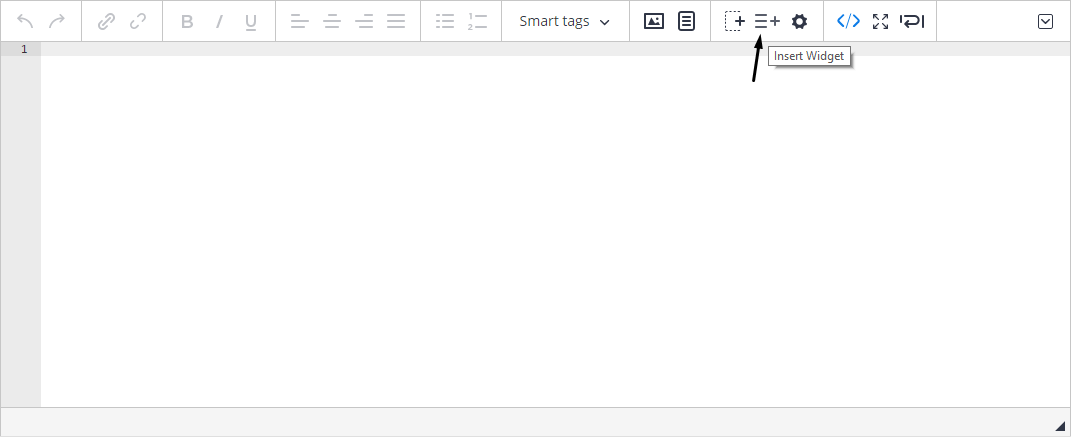
When editing HTML widget / HTML content, child widget can be added directly to HTML. This can be done by pressing Insert widget button and selecting the widget from the widgets list:
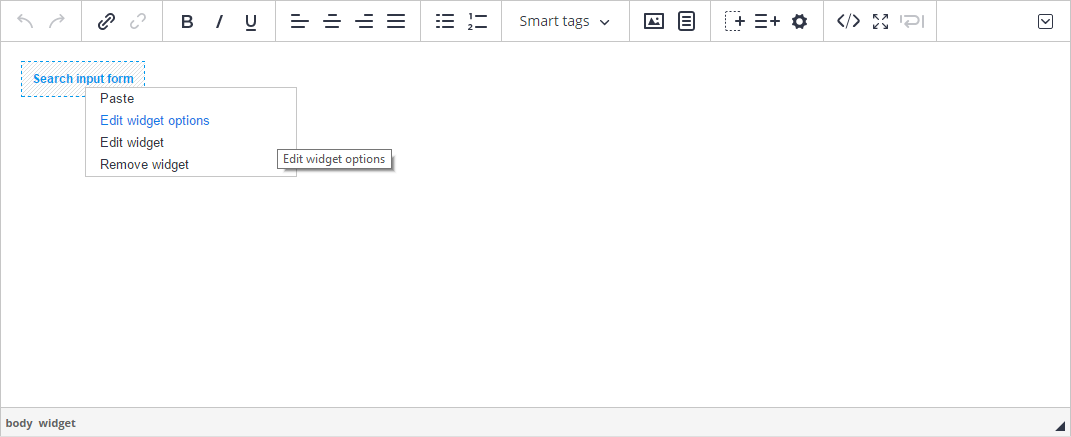
When widget is already inserted to the content, user can edit it's title. Title will not be visible when rendering page, it's visible only when editing HTML. By pressing the right mouse key on the widget, context menu can be opened. Context menu contains menu items for removing inner widget, editing inner widget or configuring widget options:
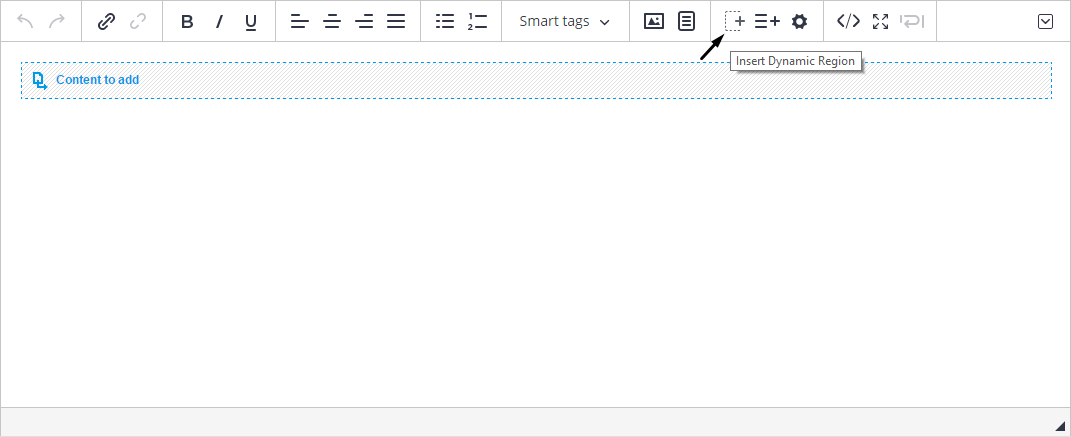
It is possible to add a dynamic region to a widget by clicking on 'Region' button. Inserted region will function in a very similar way as a regular content region.
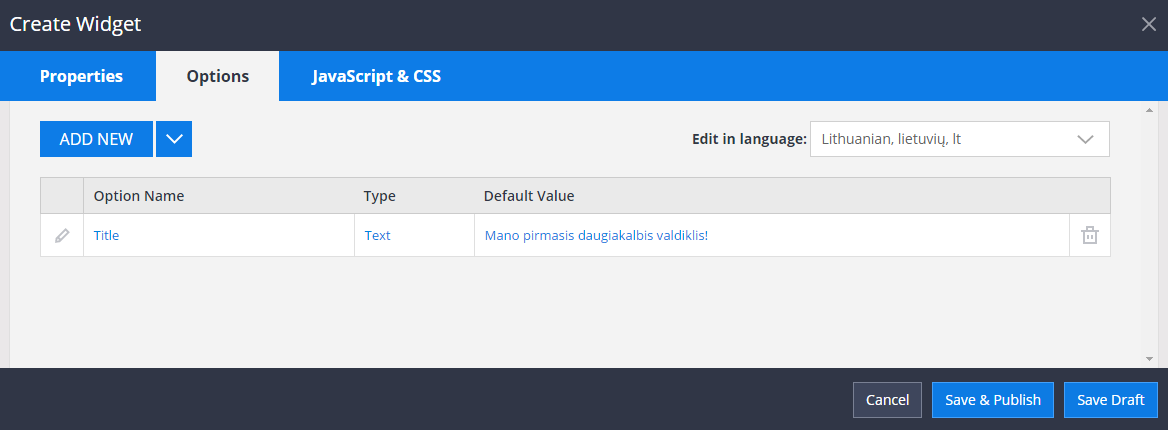
Multilingual Html content widgets can be created by defining options in different languages.
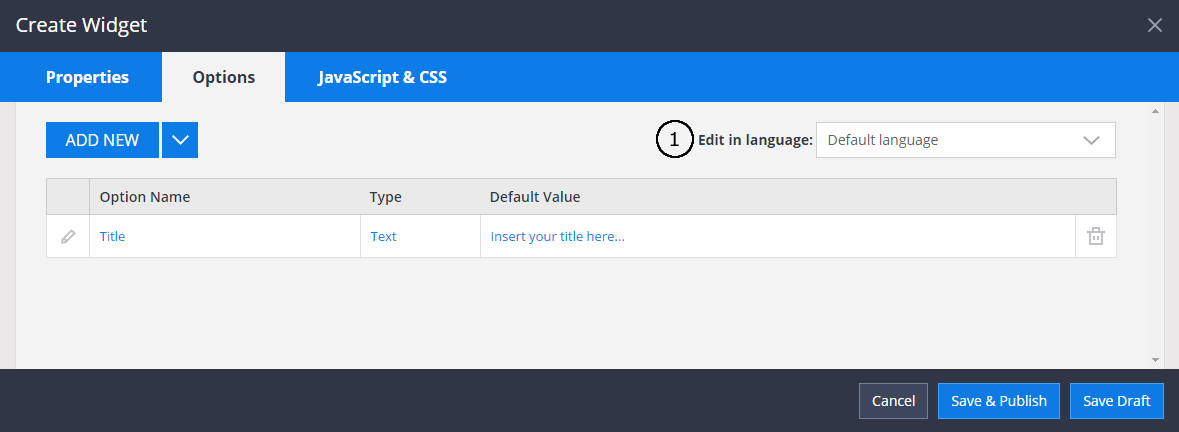
If you have multiple languages in your site, you will see an additional dropdown list for selecting a language when adding widget options. By switching languages, you can edit option values for each of them. When a value is not defined for a specific language, the one defined in Default language will be used.
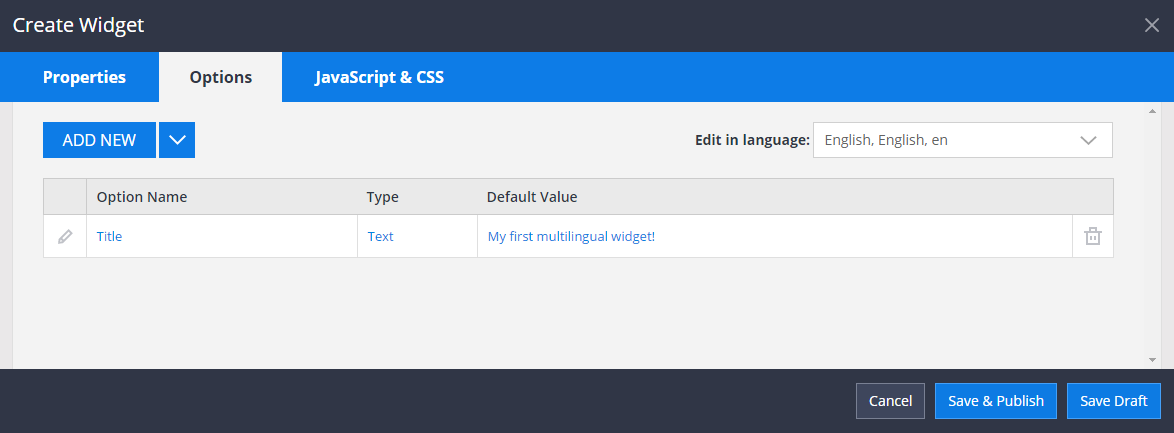
Here we created an option Title, it's default value is Insert your title here.... We have translated this option in two languages: English and Lithuanian.
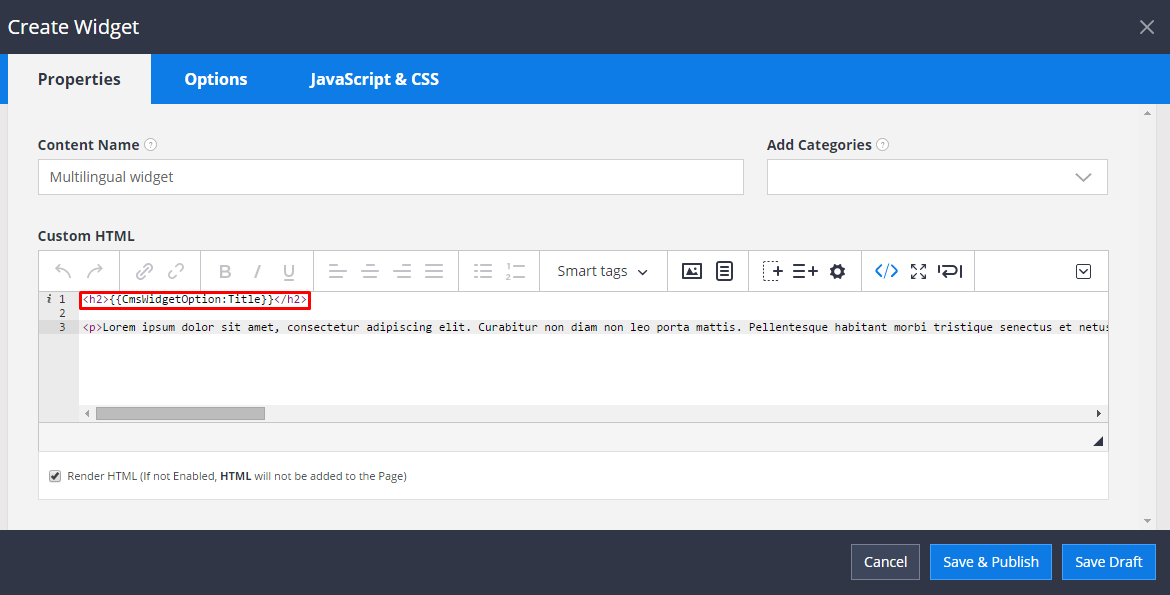
To use the translated option, insert it in widget's Html content as a smart tag.
When the widget is inserted in a page, it's language is determined by the language of the page. So, if we insert our widget in an english page, it will be rendered with an english Title option.
Lithuanian Title option will be rendered in a Lithuanian page.
The default Title option will rendered in pages with default language or any other language we have not translated yet.
To find out more about multilingual pages, read here.
