-
Notifications
You must be signed in to change notification settings - Fork 6
How to create ISA metadata file
By Philippe Rocca-Serra and David Johnson (last updated: 2018-01-16)
- Background
-
Tutorial
- Step 1: Register and login
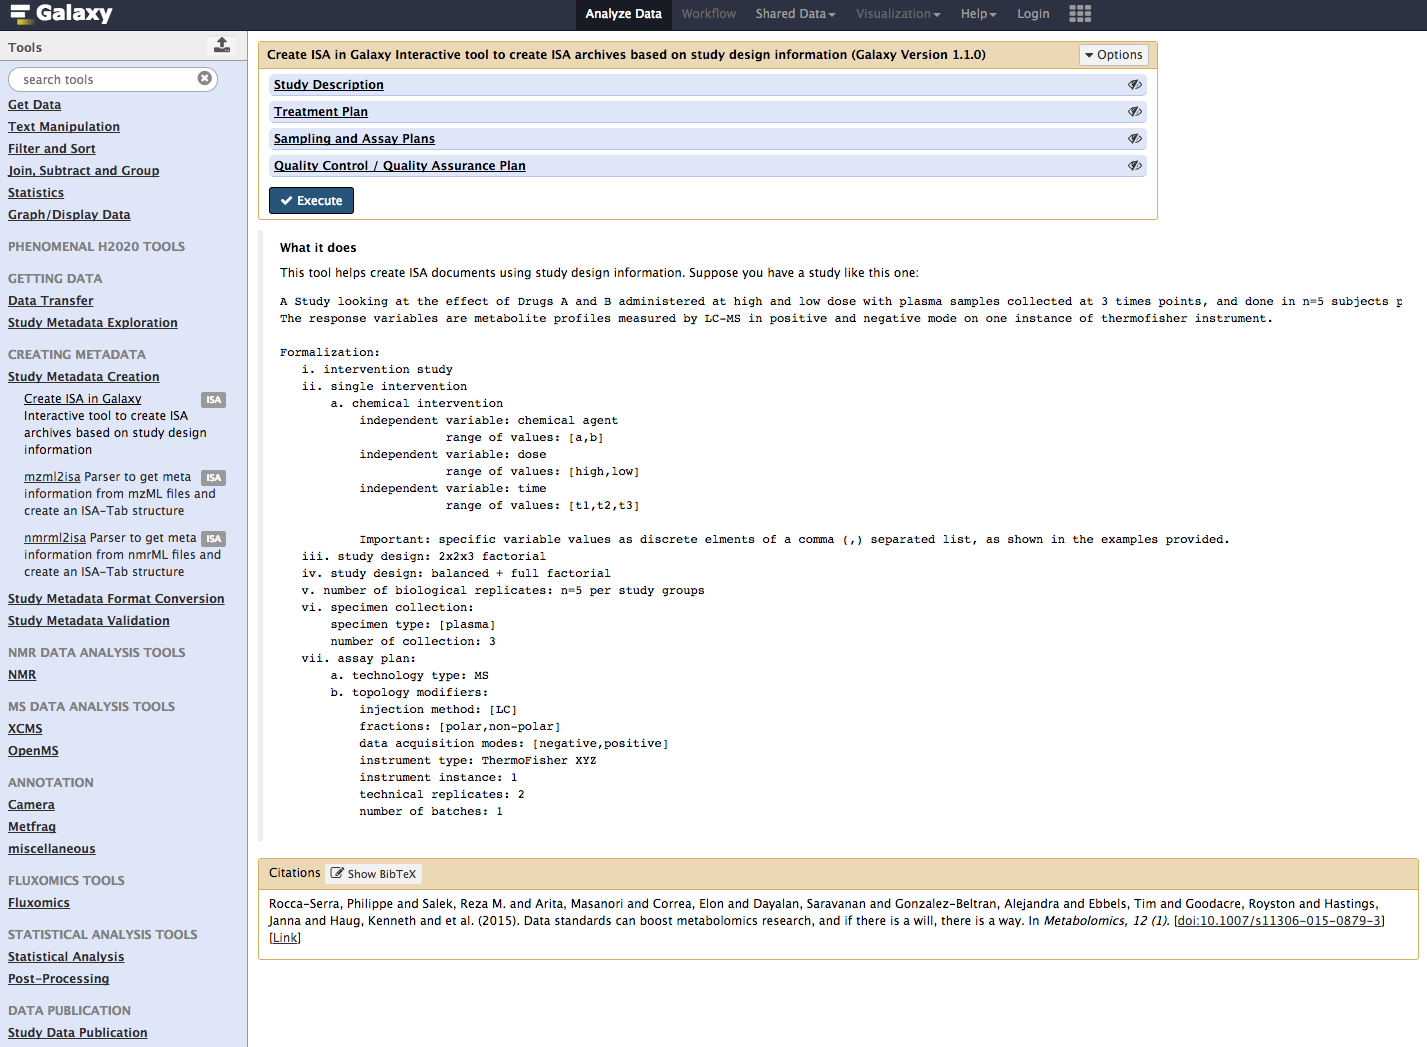
- Step 2: Invoke the Create ISA study Galaxy tool
- Step 3: Provide Basic Study Description
- Step 4: Describe the Study Treatment Plans
- Step 5: Define Sampling Plans, Assay Plans
- Step 6: Define The Quality Control Plan
- Step 7: Launch Tool Execution
- Step 8: Visualize ISA-Tab documents in Galaxy
- Feedback and help
- Acknowledgements
Archiving raw acquisition data in a repository without ancillary description diminished the value of dataset. It makes it harder for people to understand and possibly reuse the said dataset. In this tutorial, we highlight how to make the moment of the experimental plan to generate experimental metadata capable of supporting long term deposition and unambiguous description of a Metabolomics Study. To do so, we will rely on a Galaxy tool powered by a new functionality of the ISA-API to generate ISA standard compliant tabular or json documents.
The following publications provide more information about ISA format and its applications:
- Sansone A-S; ...; (2012). isa tools Nat Genet. 2012 January 27; 44(2): 121–126.
The purpose of this tutorial is to learn how to take advantage of your study design information to quickly generate ISA compliant documents, validate them and deposit them to EMBL-EBI Metabolights.
The workflow is available at our PhenoMeNal public instance and on deployed PhenoMeNal Cloud Research Environments (CRE).
The tutorial (which you can follow either with the videos or with the accompanying text) shows you how to:
- use the Create ISA study Galaxy Tool.
- validate the resulting metadata document using ISA-Tab validator function,
- preregister or deposit the ISA formatted study to EMBL-Metabolights.
Note: if you are new to Galaxy we strongly advise you to first read the "Galaxy 101 - What is Galaxy?" tutorial which will help you get a better understanding about the basic concepts when running workflows in Galaxy.
On the welcome page of Galaxy you will find a menu item "Login or register". Please make sure you are logged in before proceeding to step two. If you don't have an account yet, you can use the registration form to request access. To get an account on the PhenoMeNal public instance please check this tutorial. If you proceed without an account you will not be able to import the workflow and run it.

Using the Galaxy Tool bar on the left hand side, Select from For the 'Create ISA Study Metadata' workflow we need the following.
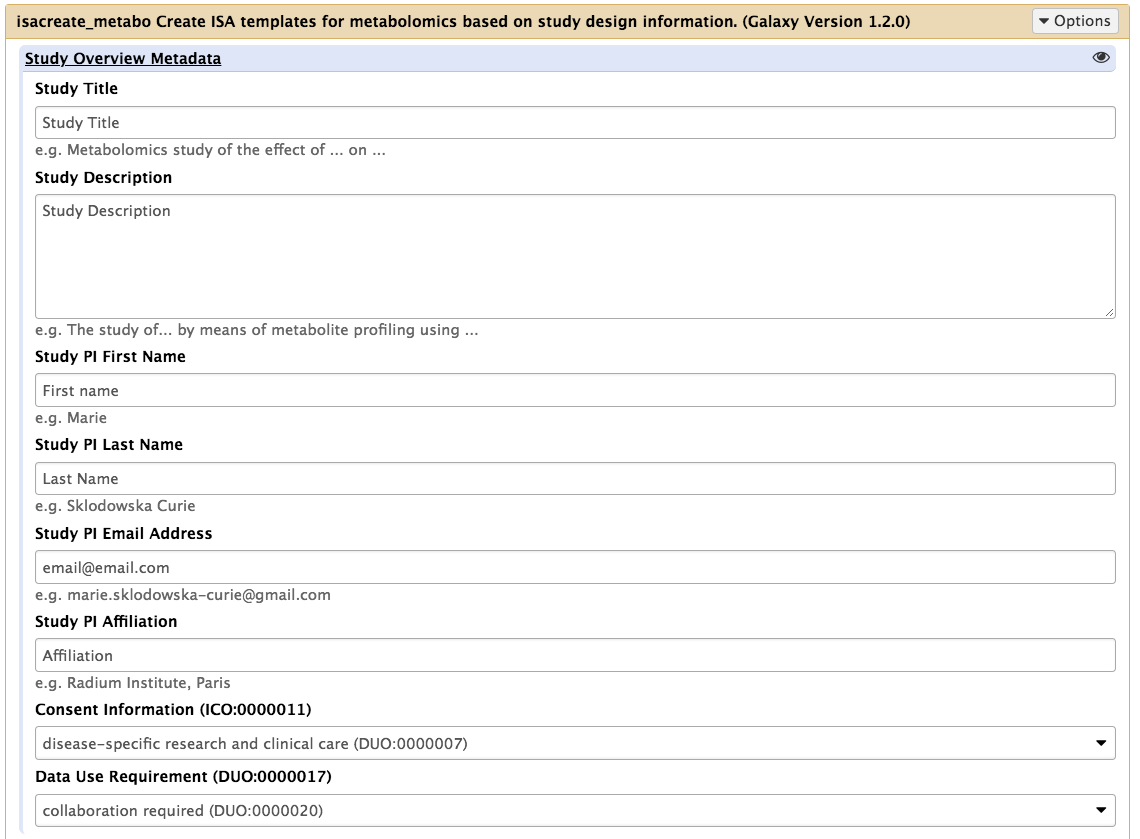
The information reporting is organized around sections. The first one is about provide core information about the goal of the study in a free text form, as well as record key information about the lead author. The field in this section are pre-filling with default value as a guidance but should of course be edited. This section now contains 2 additional fields allowing the specification of consent and terms for use information, which is a prerequisite for any patient based study. The values should be selected from a controlled vocabulary (the Data Use Ontology, produced by the Global Alliance for Genomic Health and used by resources such as the European Genome Archive.
The information present in that section is specifically centered on declaring the study independent variables and their levels. The information is used by the ISA-API function to create the underlying experimental graph.
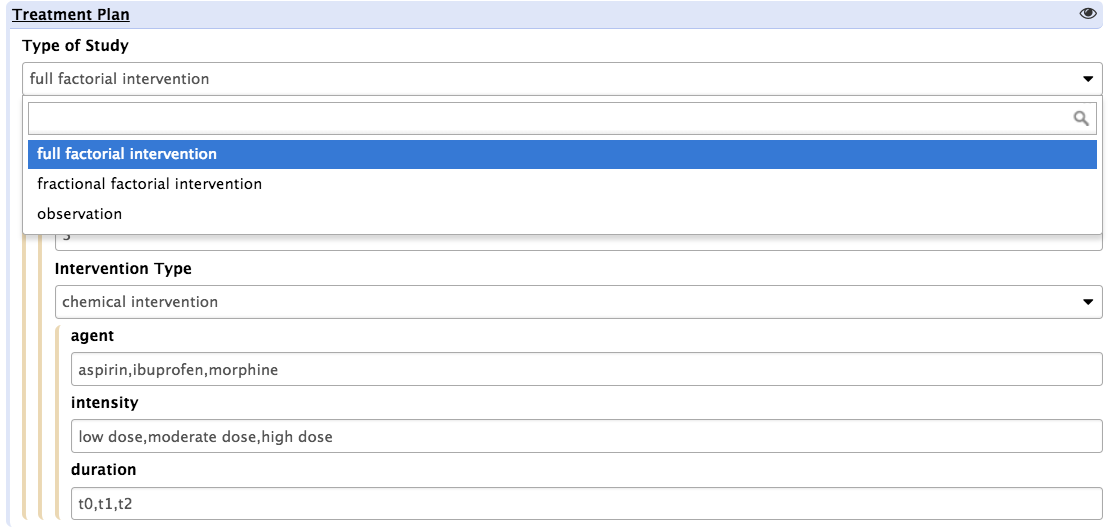
Dropdown lists are available for users to set whether the study design is a full factorial or a fractional factorial one, whether it is an intervention or an observation study, whether the interventions are single intervention or repeated ones (more than one intervention applied to study subject) or if all possible treatment groups as computed by the tool will be used or not (balanced or unbalanced).
Depending on the selection option, the tool will present a different interface to allow the specifics to be reported. For instance, if selecting 'full factorial design', users will see the following screen:
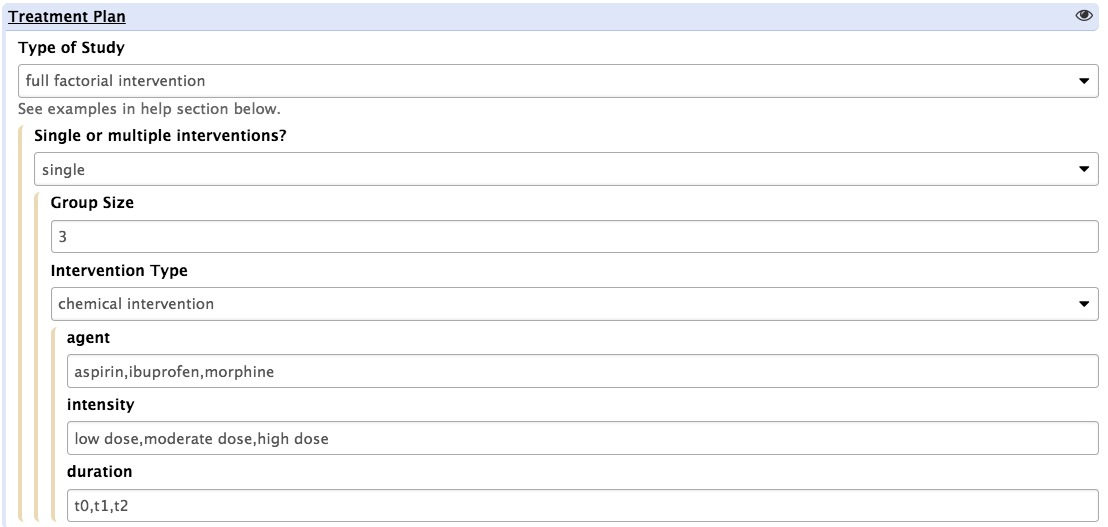
In such setting, the assumption is that the all treatment groups will be of equal sizes and the 'group size' parameter may be used to alter the default value, set to 3 biological replicates. For each intervention type, 3 independent variables allow to specify the range of perturbation agents, the range of intensities and the duration of the perturbations applied to the biological system. This information is fed to the ISA-API create engine to define a core template.
When selecting 'fractional factorial design', the user interface is altered to allow the reporting of the specific study groups.
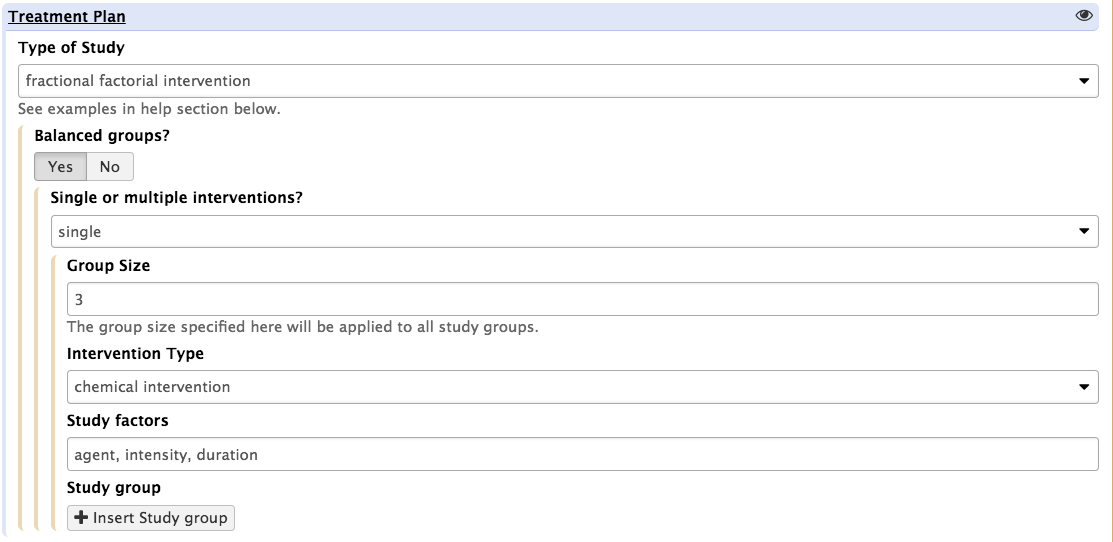
It is also possible to adjust the study group sizes when needed (by selecting the 'balanced group' boolean option)
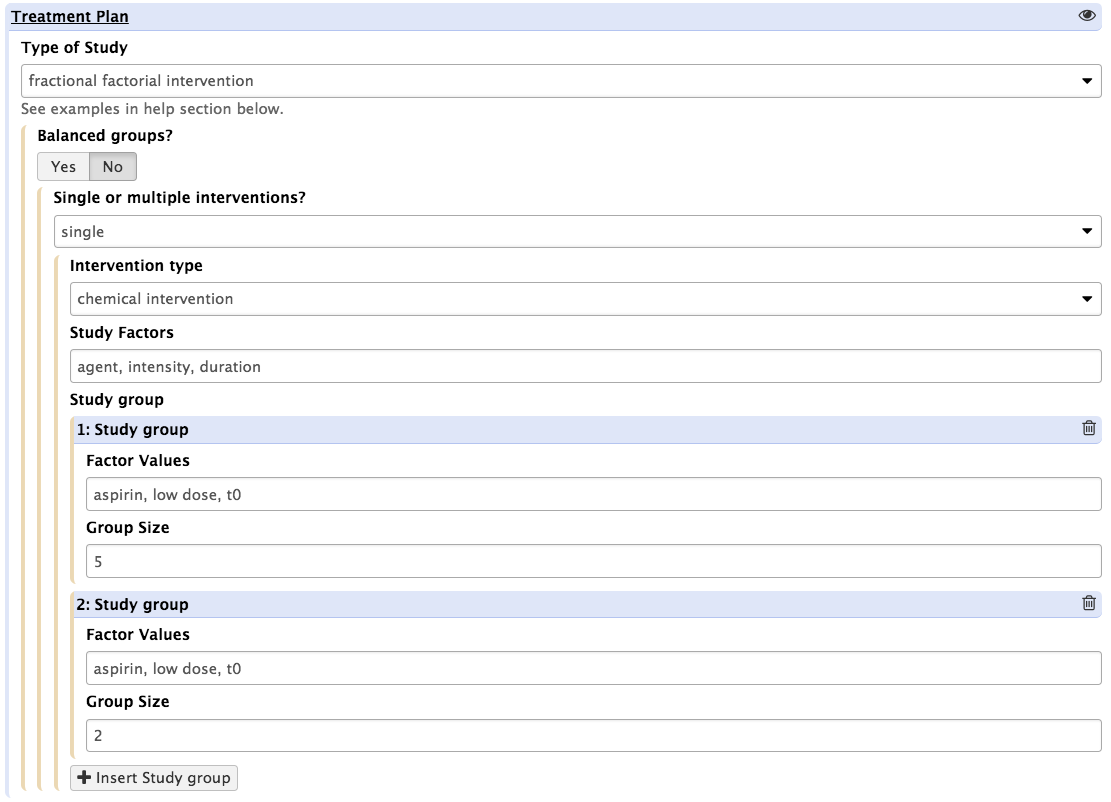
Note that when using the 'Fractional Factorial Option', users need to define the study groups one at a time (by using the '+ study group' button. This is a constraint down to the Galaxy Tool schema, not the ISA-API, which allows more flexibility.
Finally the last field of the section is mean to provide the number of experimental units per treatment groups. This corresponds to the number of biological replicates.
Next comes the declaration of the data acquisition conditions. These correspond to the identification the nature of response variables (also known asdependent variables) and on which biological specimens derived from the study subjects these measurements will be made. So the first step requested in this section is to create a sampling plan:

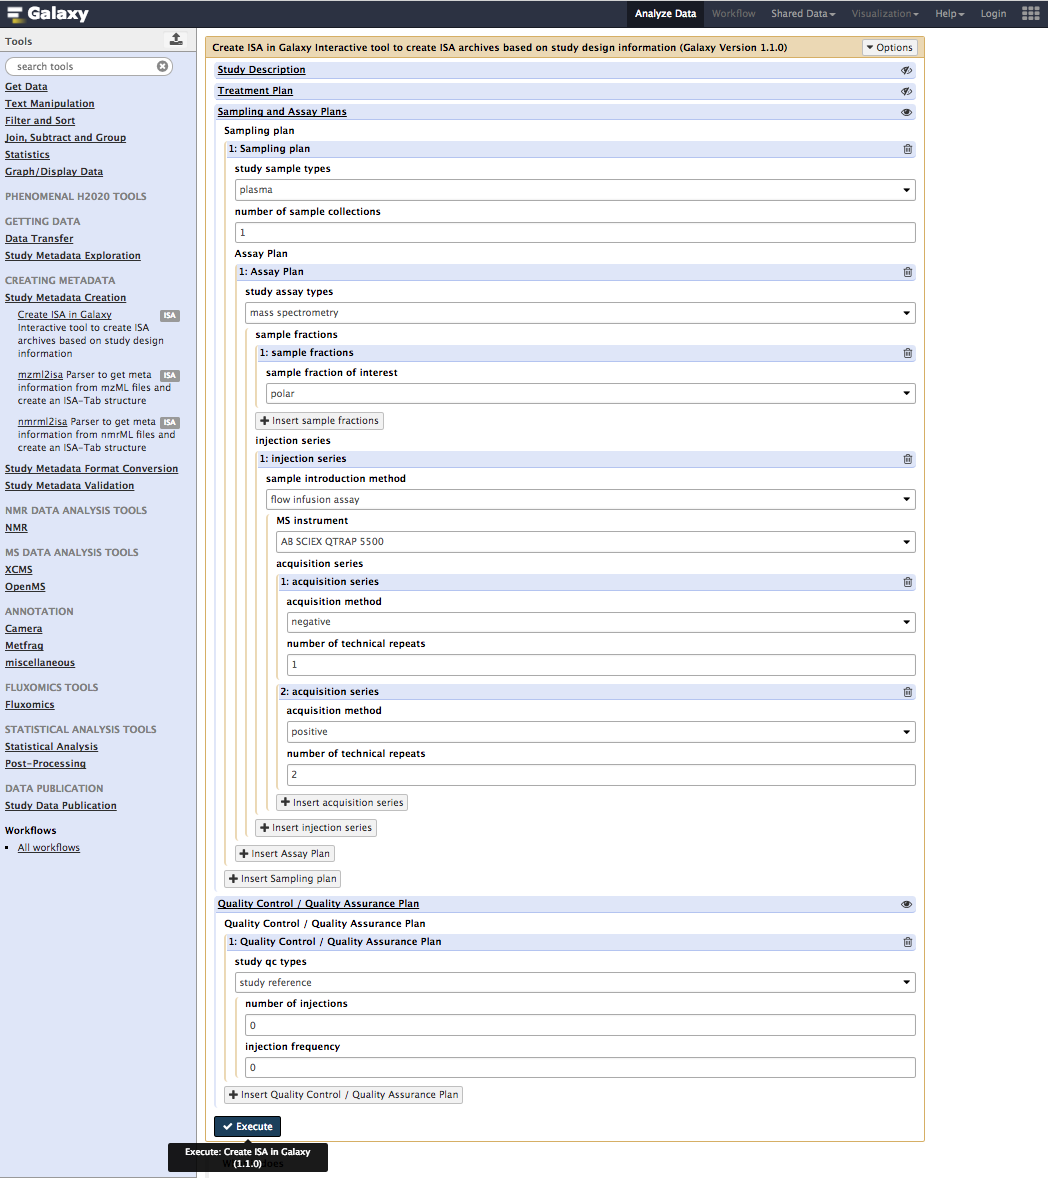
Upon clicking the insert sampling plan button, users are requested to select a type of biological material from a dropdown list, which contains UBERON marked up entries and specify the number of times such specimen type will be collected over the course of the study. For instance, if plasma samples are collected twice daily for a week, the sample type should be set to plasma and the number of sample collections set to 14.

For each of type of sample, we'll now declare all of the analytical techniques used to profile metabolites. To do so, simply press the button as shown.
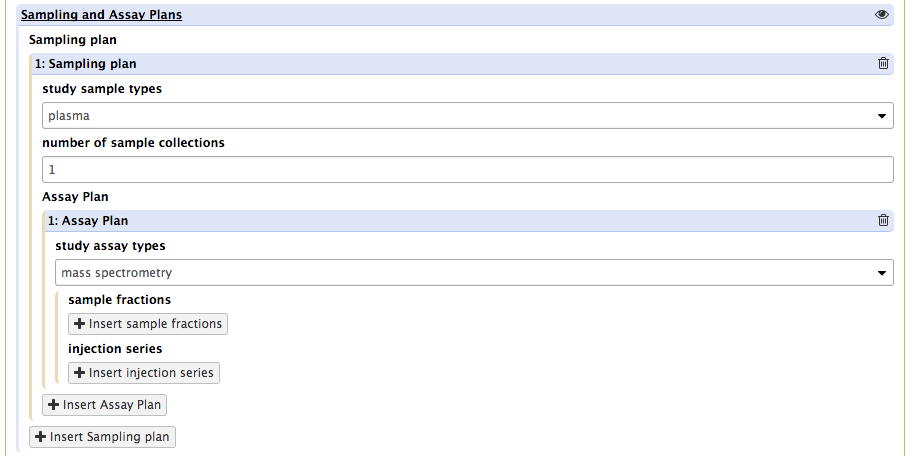
This will reveal a new set of requirements covering the nature of technology type (MS or NMR) and 2 new buttons. The first one, insert sample fraction , is to specify which fraction prepared from any of the sample of that type will be introduced in the instrument.
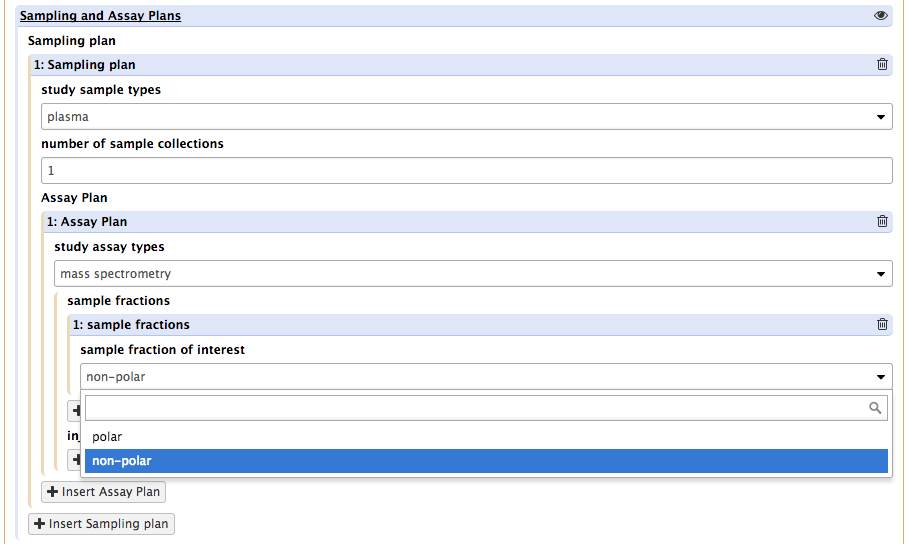
The second one, insert injection series, is meant to allow for the reporting of data acquitions conditions.
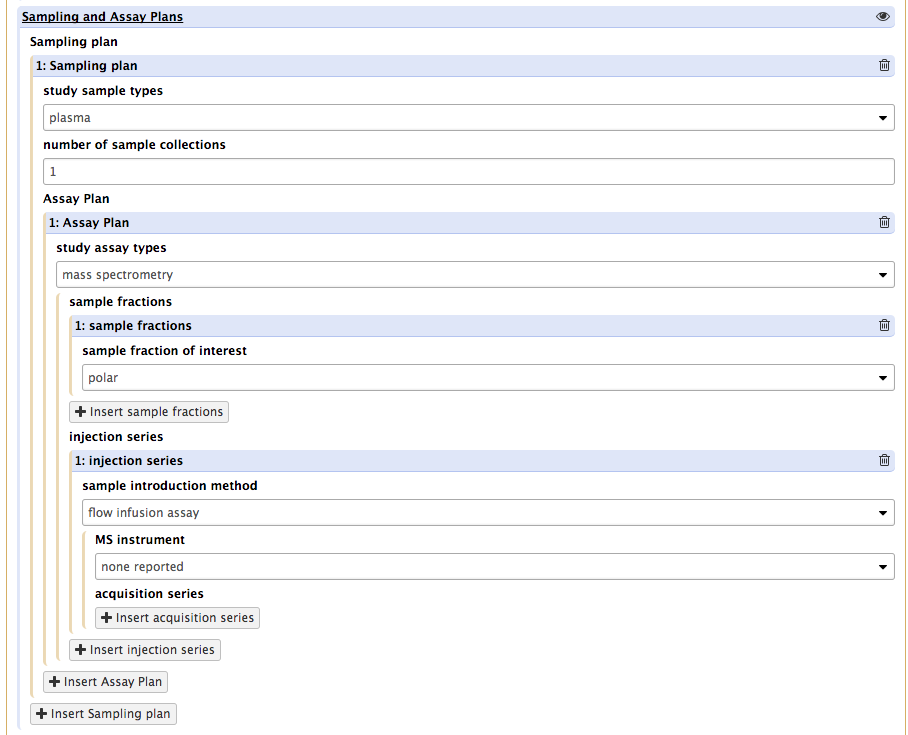
Upon pressing that button, the tool again presents a new of requirements, which vary depending on the values selected from the 'sample introduction method' dropdown list. For instance, selecting GC will add further requirements on chromatography columns and derivatization events which may be used.
It aslo reveals a new button, acquisition series.
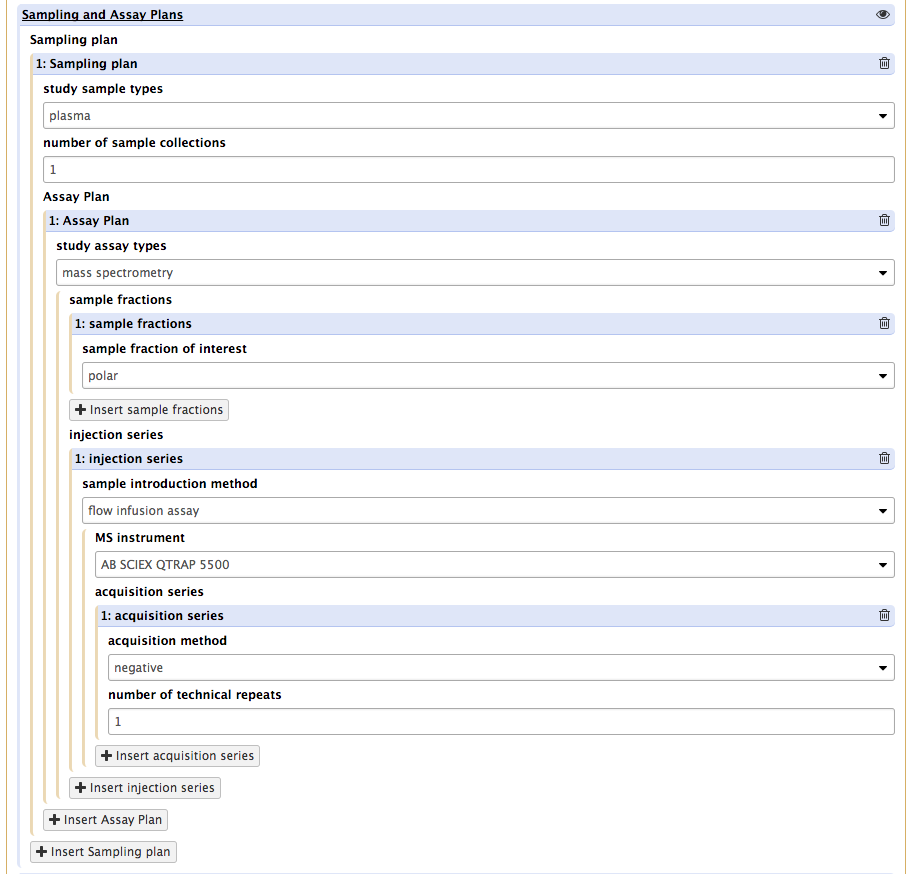
This allows users to indicate which planned polarity modes will be used. This is important information as it probes different sections of the metabolomes and will results in the creation of specific ISA assay tables or json graphs.
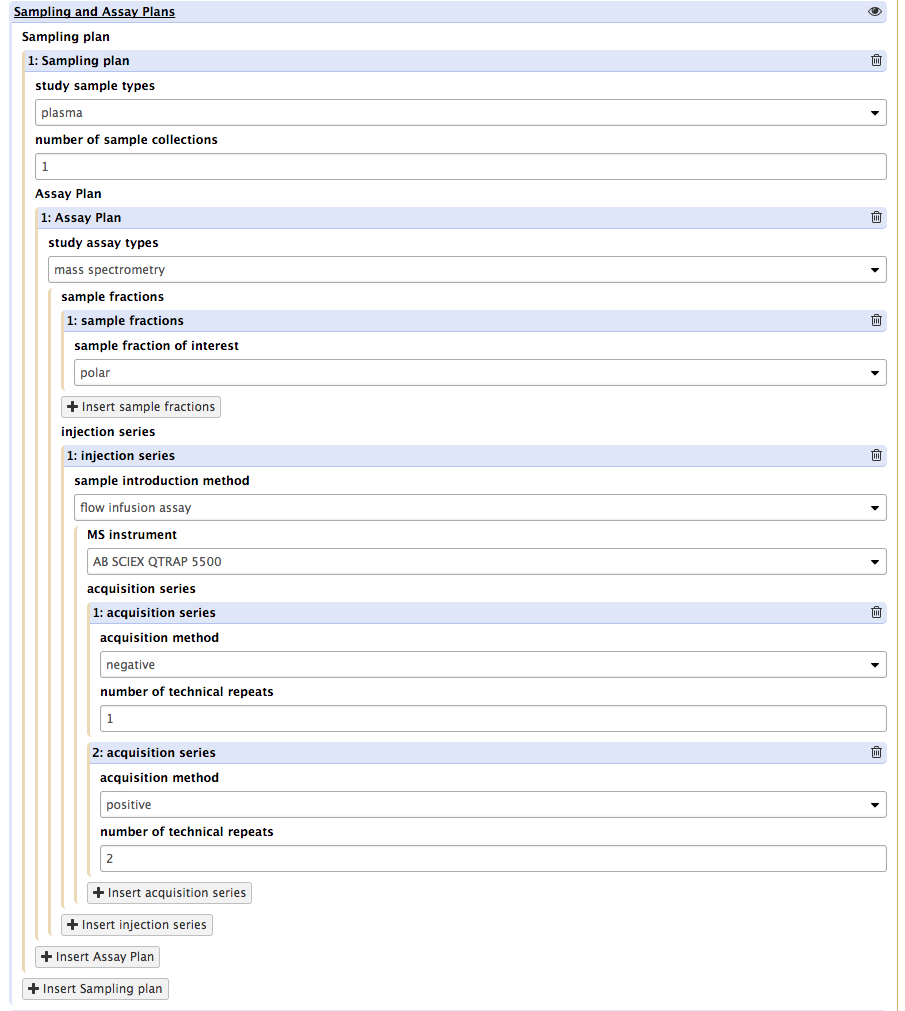
The plan shown above indicates to ISA-API that the plasma sample collected, flow infusion assay mass spectrometry will be used on an AB Sciex instrument in negative and positive modes but for the latter duplicates runs will be performed.
Important! For each sample type, more than one data acquisition modality may be used. Users will have to repeat the procedure for each of the main types. But not for every single actual sample. The tool is aware of the number of biological replicates, sample collection distinct events and technical replicates. This is used to bootstrap the creation of the study metadata descriptors.
This is an optional but highly recommended step to describe as it really what can establish the value of datasets and allows proper review.
The process is straightforward. It simply requires to identify all the QC elements by their types and specify how many would be injected and how frequently these blocks of injections would take place.

Upon pressing the insert QC/QC materials button, the tool presents the users with 3 new fields. One is a dropdown list with controled terms vetted by EMBL-EBI Metabolights and the Metabolomics Standards Initiative (MSI) for reporting reference materials and controls.

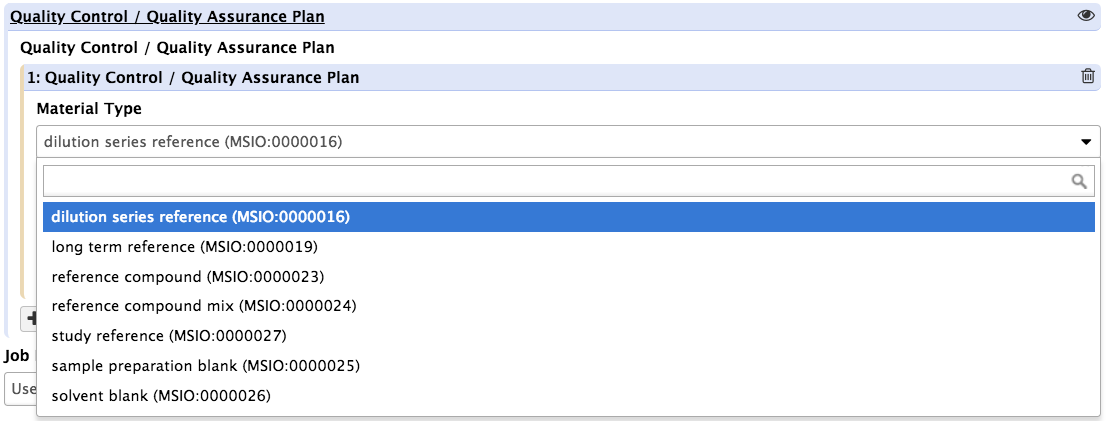
Again, the action should be repeated as many times as necessary.
There is one thing left: pressing the Execute button to send all the user input to the ISA-API create function.
Please note that depending on the queue, it may take several minutes before the ISA Tab files to be generated. However, the process should be reasonnably quick, unless large cohorts are being tested along with complex data acquisition modalites and many technical replicates. This conditions lead to a more complex experimental graphs which needs to be built but the API.
If successful, the resulting ISA document may be viewed as shown below:
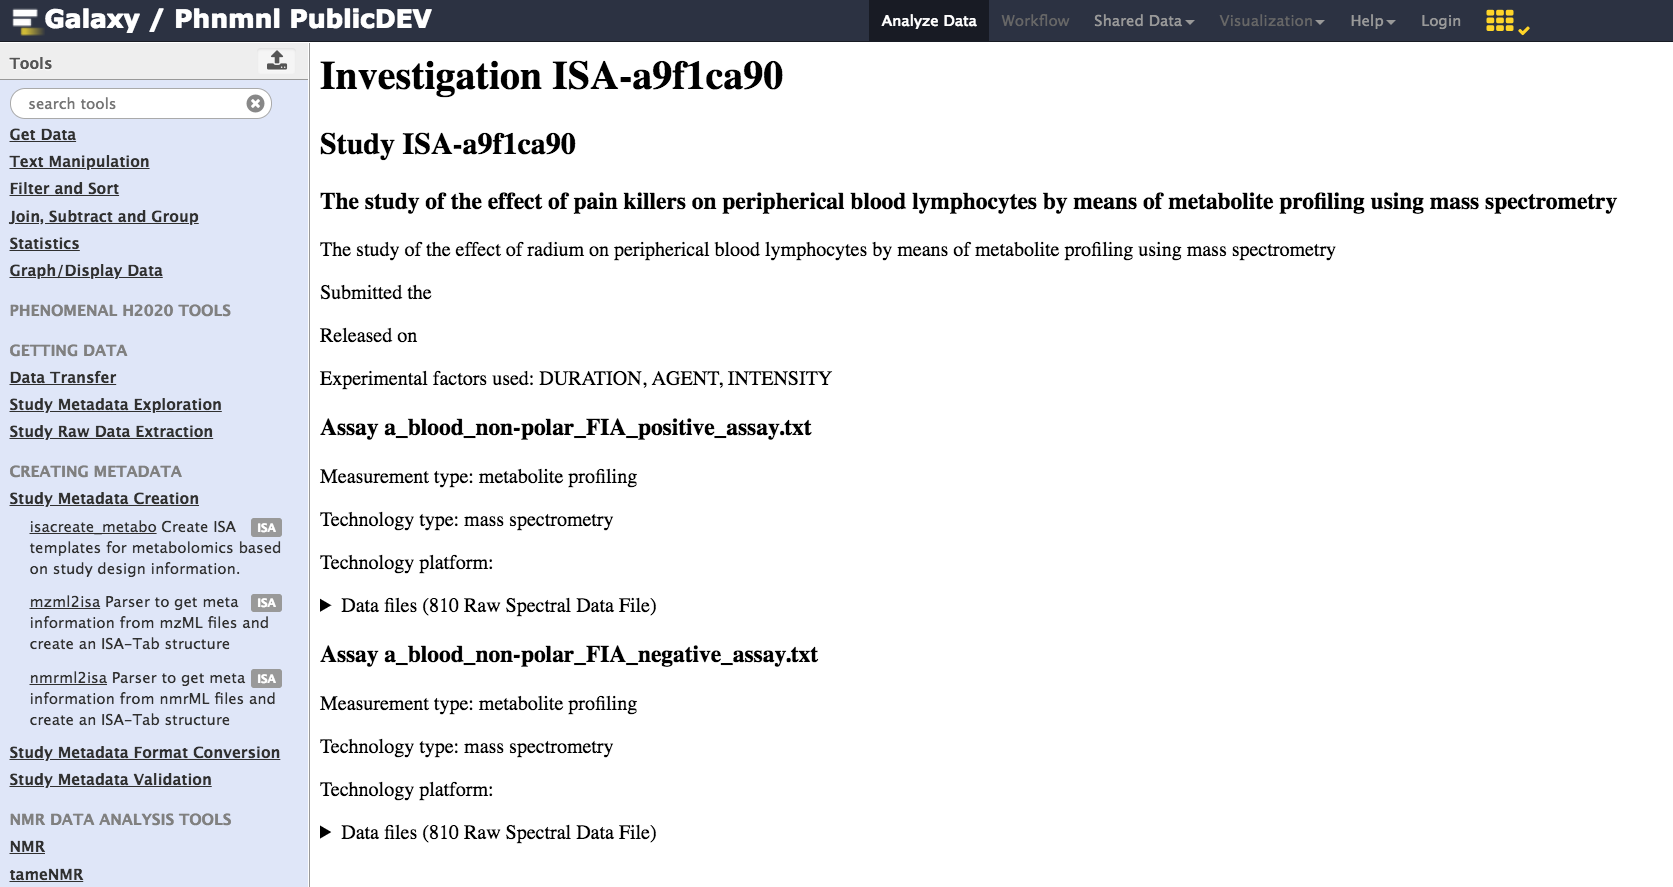
A new visualization plugin associated with the ISA Galaxy datatype is now available as part of this new release. In order to use it, one needs to be logged in the the PhenoMenal Galaxy Infrastructure. So once login, the first thing to do is to activate the Galaxy Scratchbook functionality.

This triggers a cool feature which allows dedicated visualization windows to be open and tiled.
Then, (rememer you need to be logged-in to be able to use the visualization plugin), go to this history section on the right pane and select the history identifier for ISA. It will expand and reveal a 'histogram' icon, which is the one to click to activate the ISA-Tab viewer plugin.
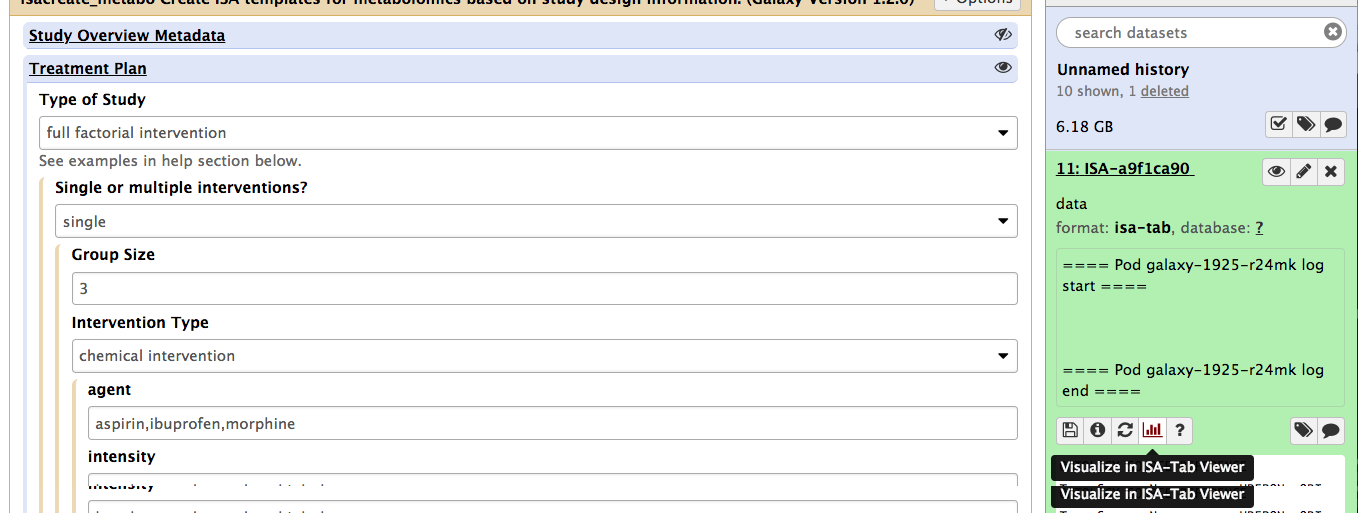
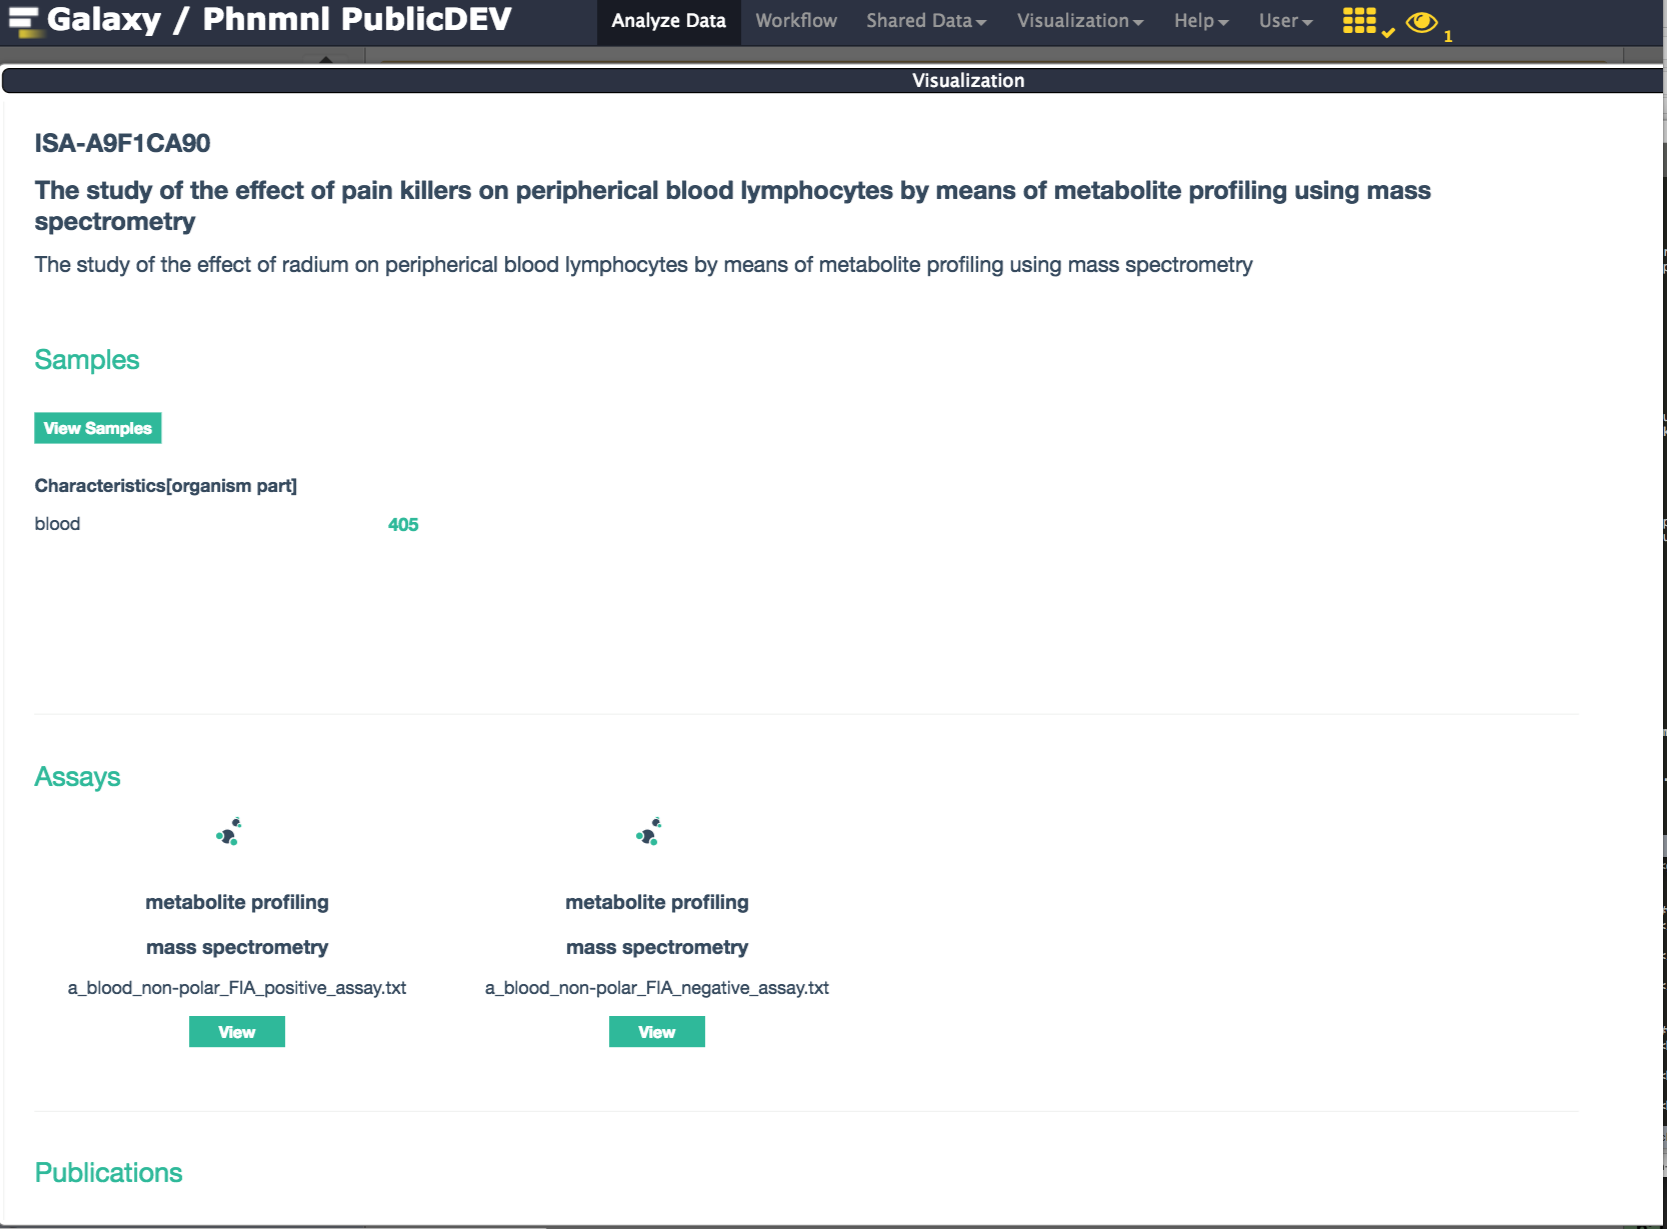
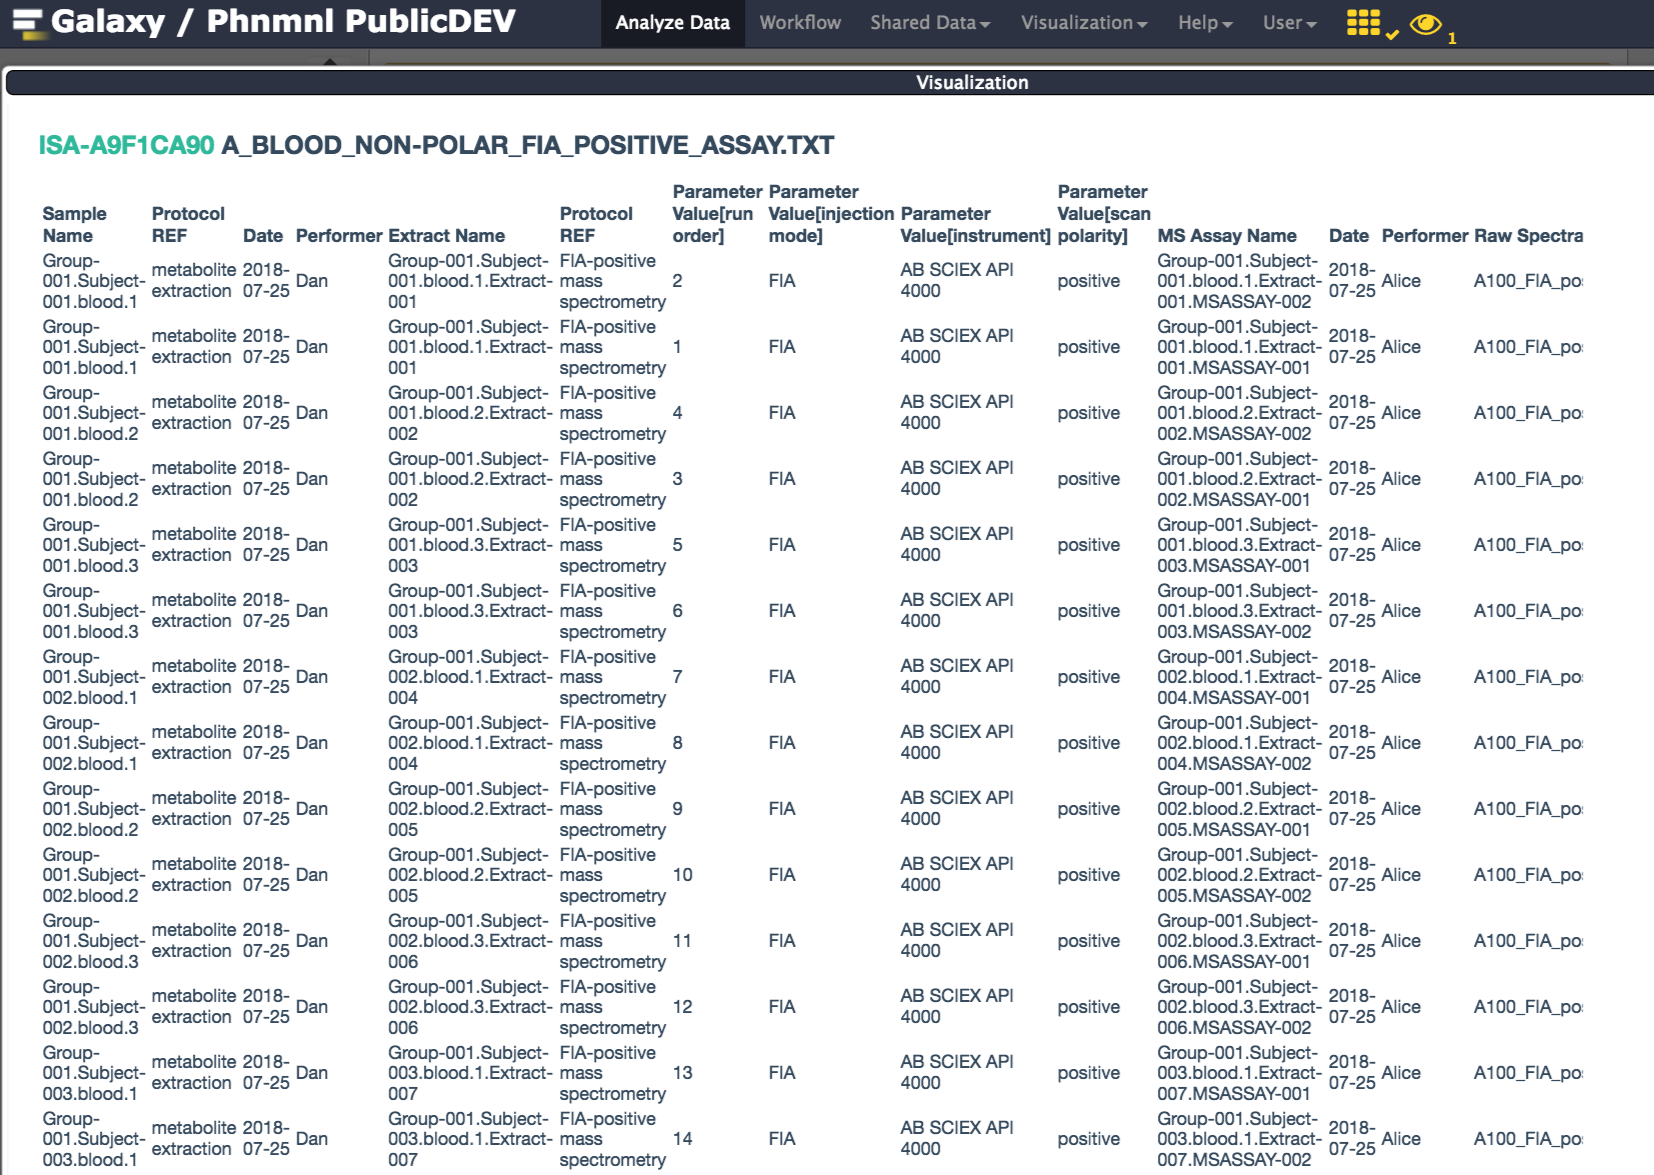
This will open a new window, courtesy of the Scrapbook function, displaying a rendering version of the ISA documente generated by the ISAcreate Galaxy tool.
Overall Summary:
Viewing an Assay Table:
Feel free to report any feedback to us by email or via the Online Feedback Form.
Other tutorials are available on our website (see the PhenoMeNal wiki).
All tools have been developed by the group of Susanna Sansone, from the University of Oxford.
All of these tools have been containerized by David Johnson and Philippe Rocca-Serra.
 |
Funded by the EC Horizon 2020 programme, grant agreement number 654241 |  |
|---|
